Everything about Unity Packages
— Unity development, Code management and collaboration — 3 min read
1. How Unity works with packages
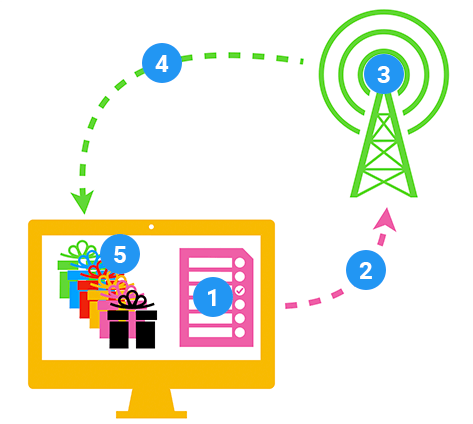
When Unity opens a Project, the Unity Package Manager reads the Project manifest to figure out what packages to load in the Project. Then it sends a request (2) to the package registry server (3) for each package that appears as a dependency in the manifest. The package registry then sends the requested information and data back to the Package Manager (4), which then installs those packages (5) in the Project. Each Project has its own manifest which lists the packages to load as “dependencies” of the Project.

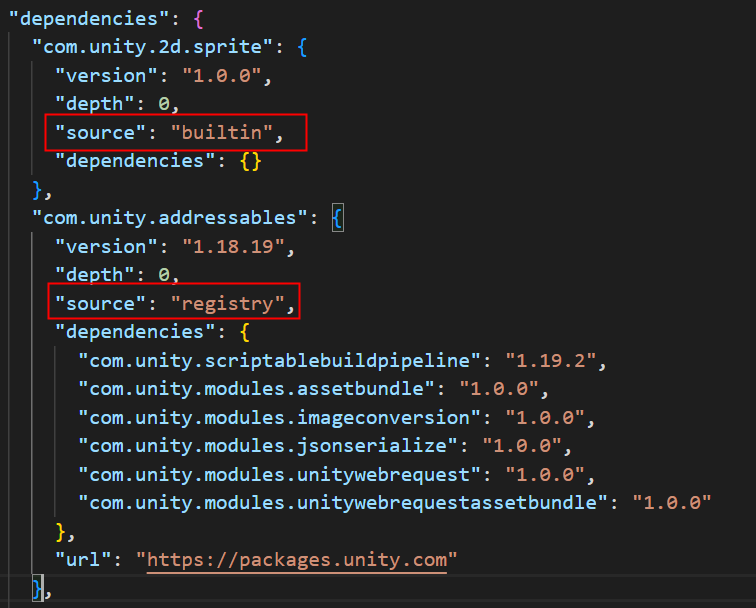
Project manifest stores information that the Package Manager needs to locate and load the right packages, including a list of packages and versions, declared as dependencies.
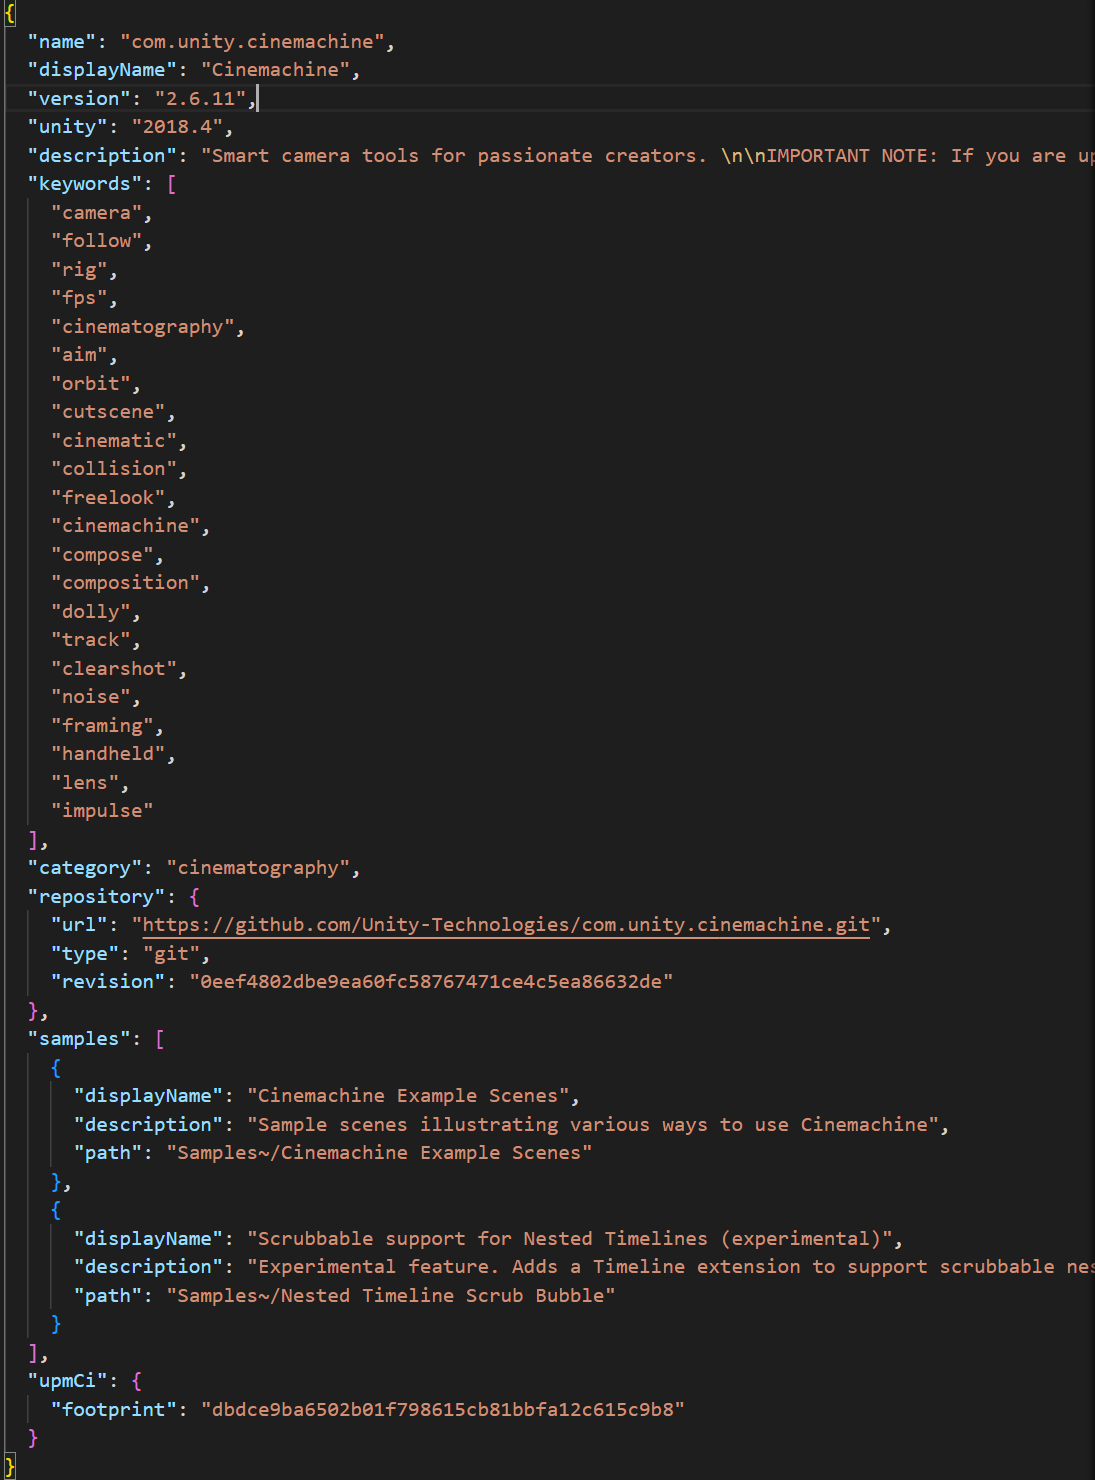
Package manifest stores information about a specific package, and a list of packages and versions that the package requires.
2. Package manager
There are three ways of using the Package manager:
By user interface
By changing the package manifest
By script API
3. Package dependencies
When you add a package to a project manifest, Unity considers that package a dependency of the project (a direct dependency). However, a package can also have dependencies on other packages, which create indirect dependencies in any projects that require that package.
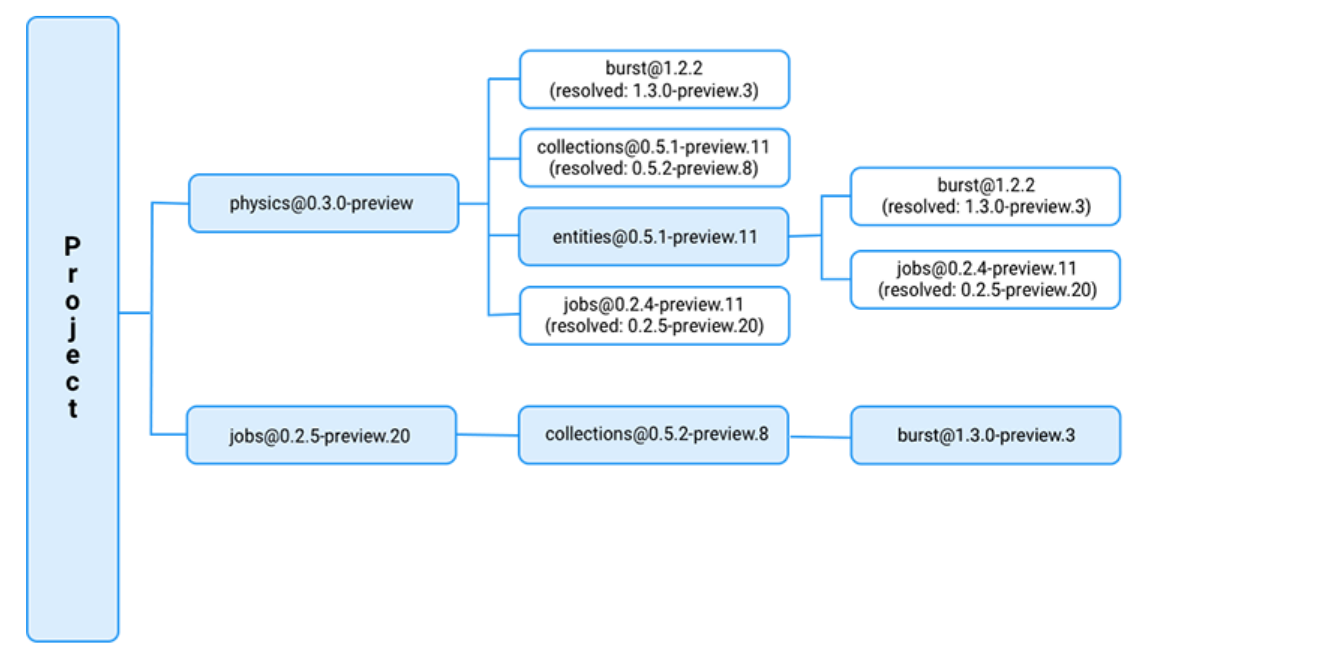
Since most projects require more than one package in order to develop games and apps, the Package Manager has to evaluate all the requested package versions to retrieve from the registry (whether direct or indirect), and decide which among those package versions to install. To do this, it computes the set of packages that satisfies all direct and indirect dependencies in the project, starting with the project dependencies and recursively exploring each indirect dependency, collecting all the dependency information, then picking a set of packages that satisfies the dependency requirements without any conflict. For example, this dependency graph represents a project with four direct dependencies and all of their indirect dependencies:

To provide the most efficient solution, the Package Manager prioritizes package versions that it previously used by tracking them in a lock file. This guarantees that subsequent dependency resolution using the same inputs results in the same outputs. It also minimizes time-consuming operations such as downloading, extracting, or copying packages.
Using the set of direct and indirect dependencies, the Package Manager selects the highest version of the burst package (burst@1.3.0-preview.3), which satisfies the collections@0.5.2-preview.8 package’s dependency:
4. Creating Custom packages
4.1 Package contents
Packages can contain the following:
- C# scripts
- Assemblies
- Native plugins
- Models, Textures, animation, audio clips, and other assets.
4.2 Steps for creating a custom packages
To create a new package:
Create an empty shell for the package using one of these methods:
- Set up an embedded package. (recommended)
- Set up a local package.
Implement your tools, libraries, and any assets your package requires.
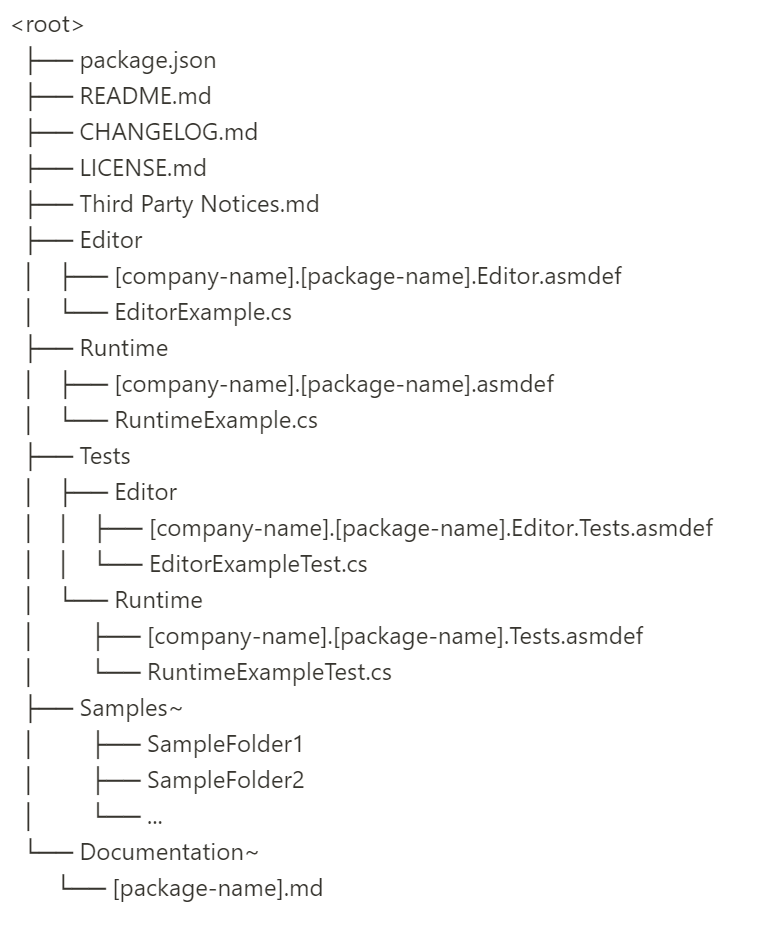
Make sure the layout of your package follows the package layout convention for Unity packages.
Add tests to your package. Tests are essential for ensuring that the package works as expected in different scenarios:
- Write all your Editor Tests in
Tests/Editor. - Write all your Playmode Tests in
Tests/Runtime.
- Write all your Editor Tests in
Rename and update the assembly definition files.
Add samples to your package, if you have them. Note: Packages can contain only samples, but you can also include samples as part of a tool or template package using the same layout and JSON structure.
You can update the
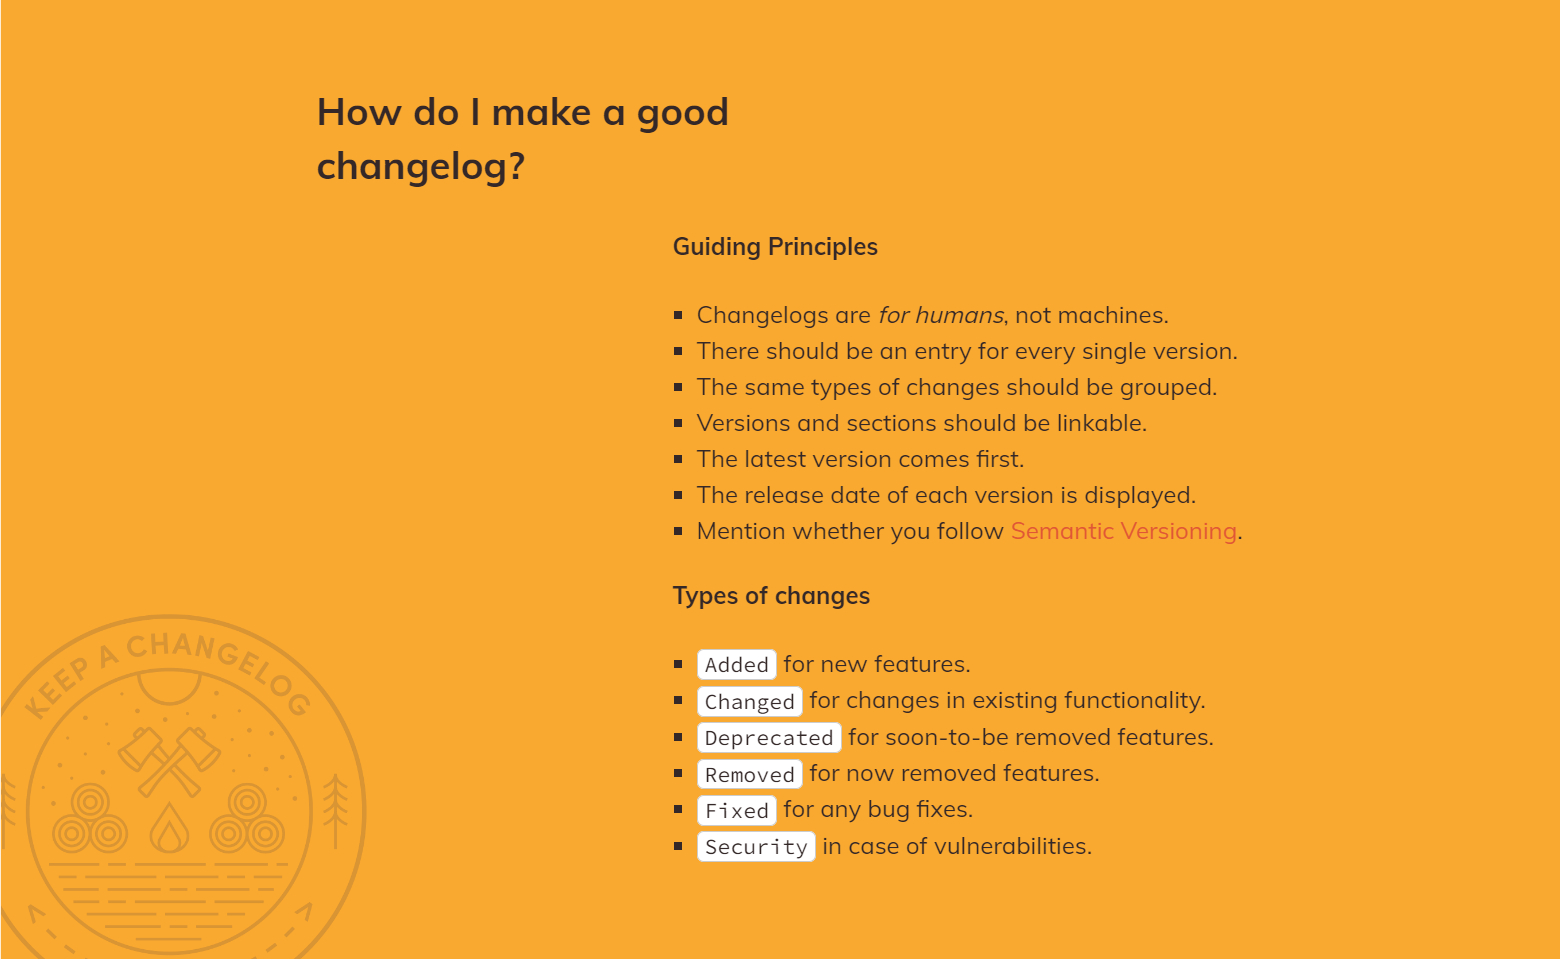
CHANGELOG.mdfile every time you publish a new version. Every new feature or bug fix should have a trace in this file.Tip: You can provide a link to an external web page where you host this package’s changelog using the
changelogUrlproperty in your package’spackage.jsonmanifest file.You can include licenses and third-party notices in the
LICENSE.mdandTHIRD PARTY NOTICES.mdfiles.Tip: You can provide a link to an external web page where you host this package’s licensing and third-party notices using the
licensesUrlproperty in your package’spackage.jsonmanifest file.Document your package.
Tip: You can provide a link to an external web page where you host this package’s documentation using the
documentationUrlproperty in your package’spackage.jsonmanifest file.Share your package via local, git, or Scope registry.
4.3 Create a package
Follow the steps to add an embedded package to the Unity project:
Step1. Find the packages folder, and a new folder and name it with matches the package name(for example com.example.test). This is important for unity to find your package.
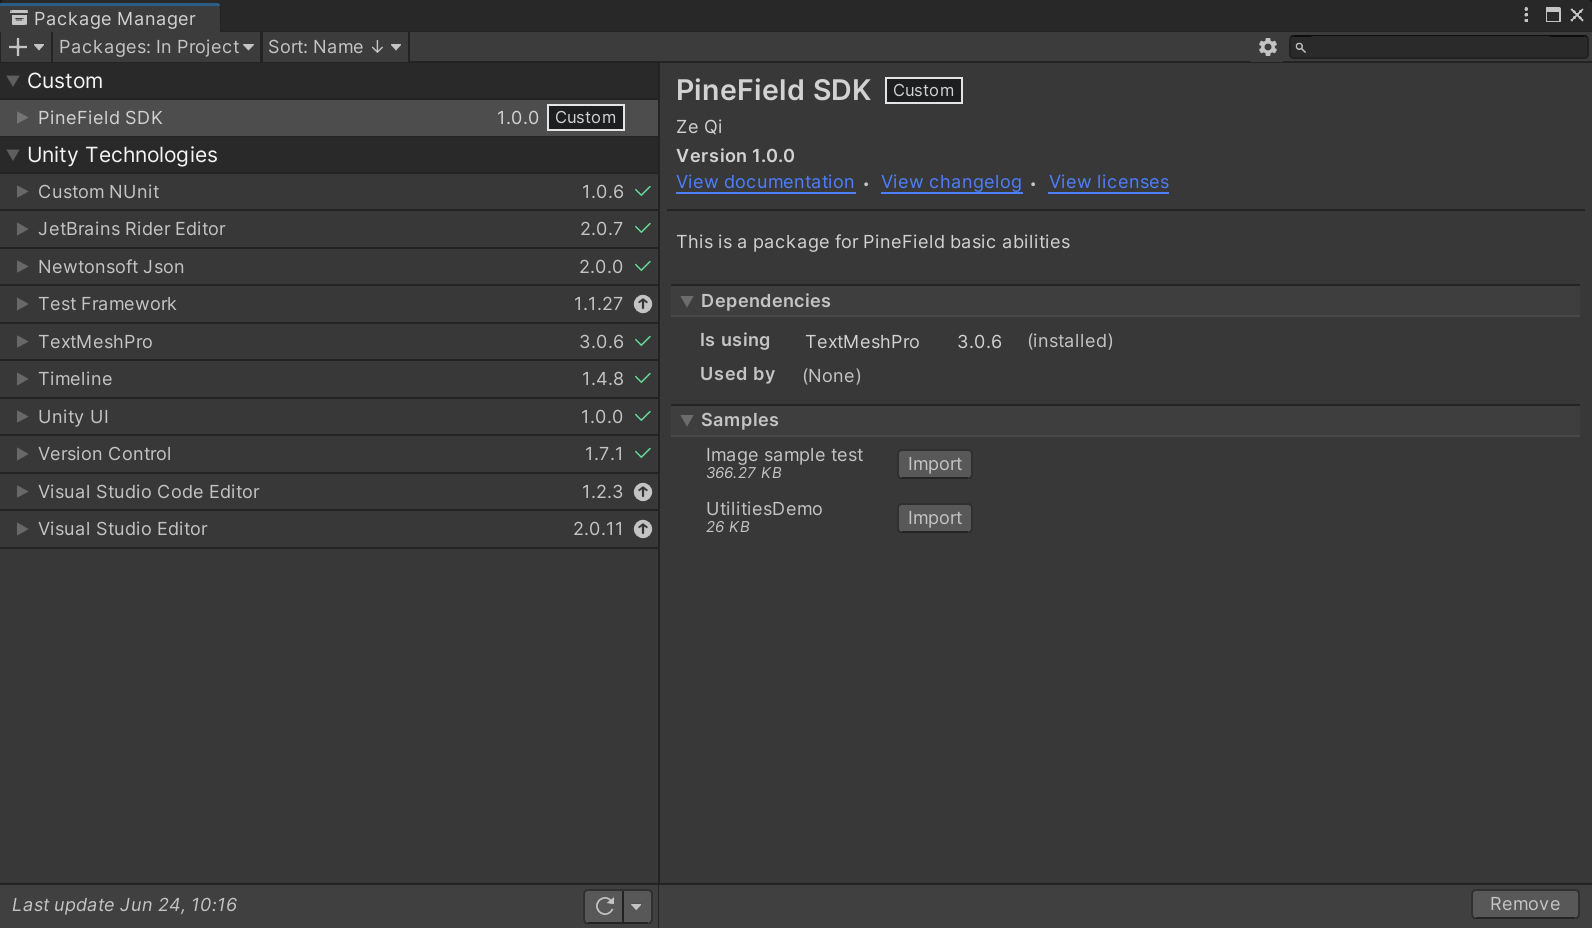
Step2. Open this folder and add a “package.json” file inside. Fill in all the fields that is required and recommanded as describe in Unity documentation in this json file (also called package manifest)

Then you will see this
4.4 Package Layout
4.5 Change Log
4.6 Load packages
There are three ways to load packages:
4.6.1 load from disk
click the + button of the package manager, and add the package.json of the package that you want to add (cannot find any info about version control)
4.6.2 load from git
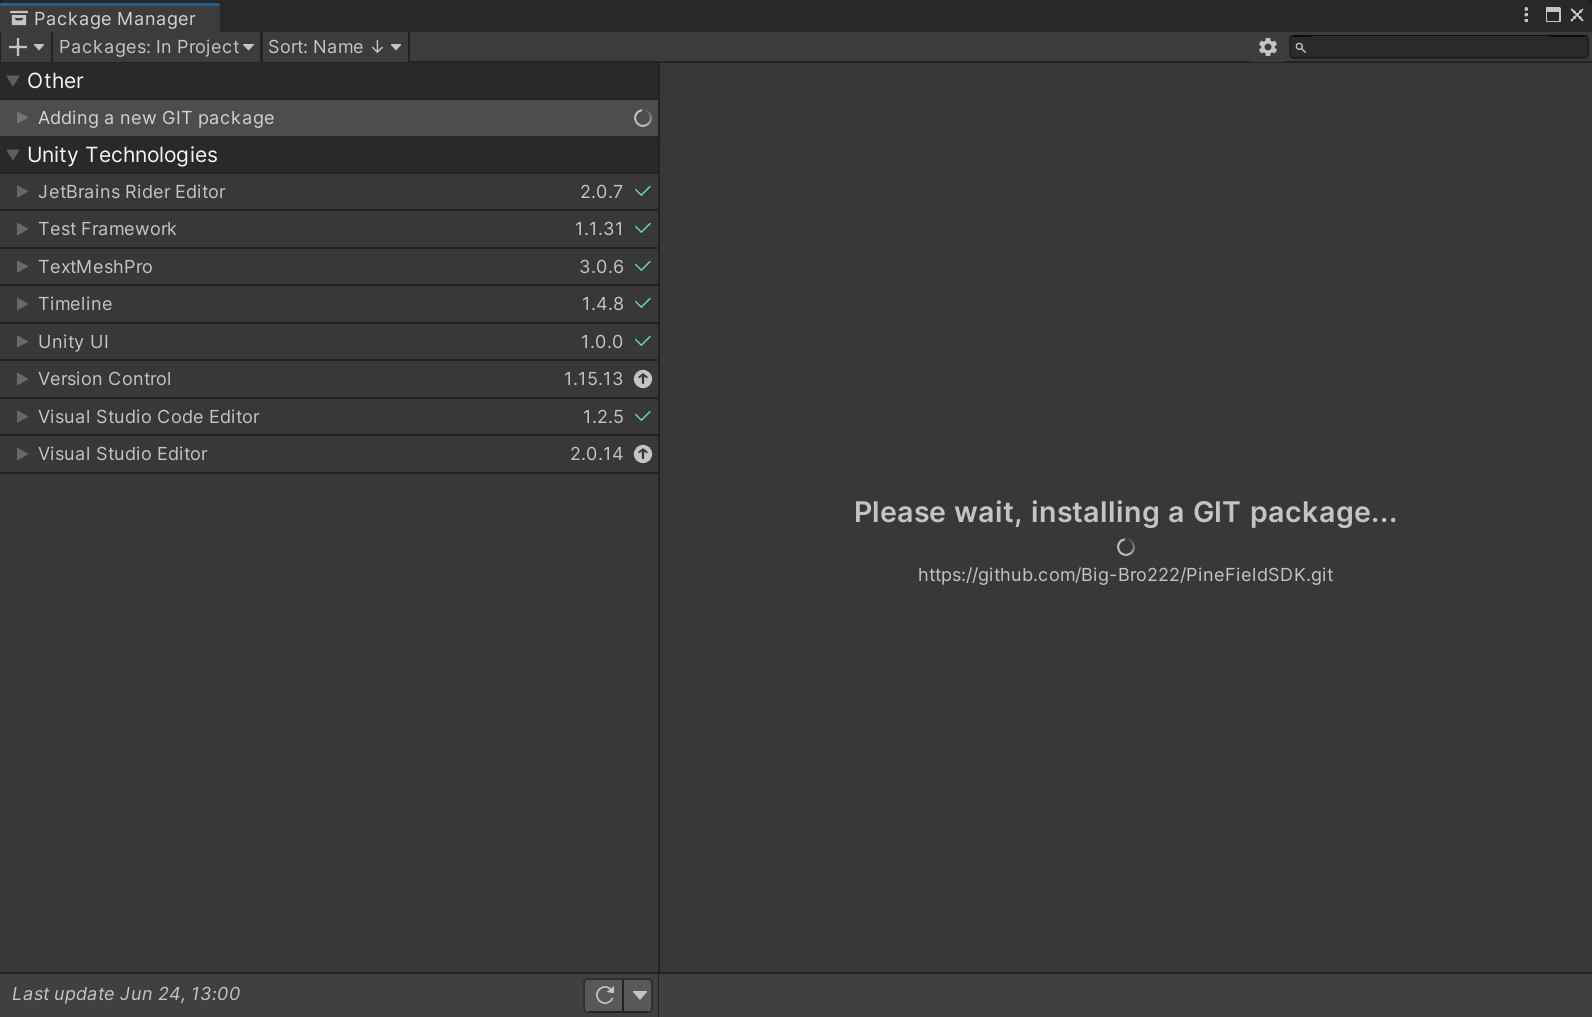
click the + button of the package manager, add the git url(change version by hardcoding in the project manifest tag and git URL, eg: "https://github.com/Big-Bro222/PineFieldSDK.git#1.0.0")
4.6.3 load from scope registry (TBD)
Reference
How to define version in Unity
https://docs.unity3d.com/2020.3/Documentation/Manual/PackagesList.html
https://docs.unity3d.com/2020.3/Documentation/Manual/ScriptCompilationAssemblyDefinitionFiles.html
https://docs.unity3d.com/2020.3/Documentation/Manual/upm-manifestPkg.html