UPM custom Scope Registry-(Google Cloud)
— Unity development, Code management and collaboration — 6 min read
A while ago Unity introduced its Package Manager, a nice and simple way to bring reusable packages into a project while keeping track of dependencies and compatible Unity versions.
How great would it be if we could use this system for our own reusable assets, if we could store them on our own server ****and have them show up in the package manager too?
Well, as it turns out we can! *(since Unity 2018.3+)*
Unity is using a normal npm package server to serve their packages. So we can simply set up our own npm package server, hook it into the project manifest, and have the package manager serve our own packages in addition to the ones from Unity!
Unity is using Artifactory, but we’re going to install Verdaccio (a lightweight and free npm registry server)! We’ll put it on a Micro Instance on the Google Cloud Compute Engine (but you could just as well have it run in any other cloud, on your ↗️ local NAS, or even on your local PC). Let me walk you through it…
1. Creating a server instance
Go to your Google Cloud Platform Console, choose Compute Engine > VM Instances, and click on CREATE INSTANCE.
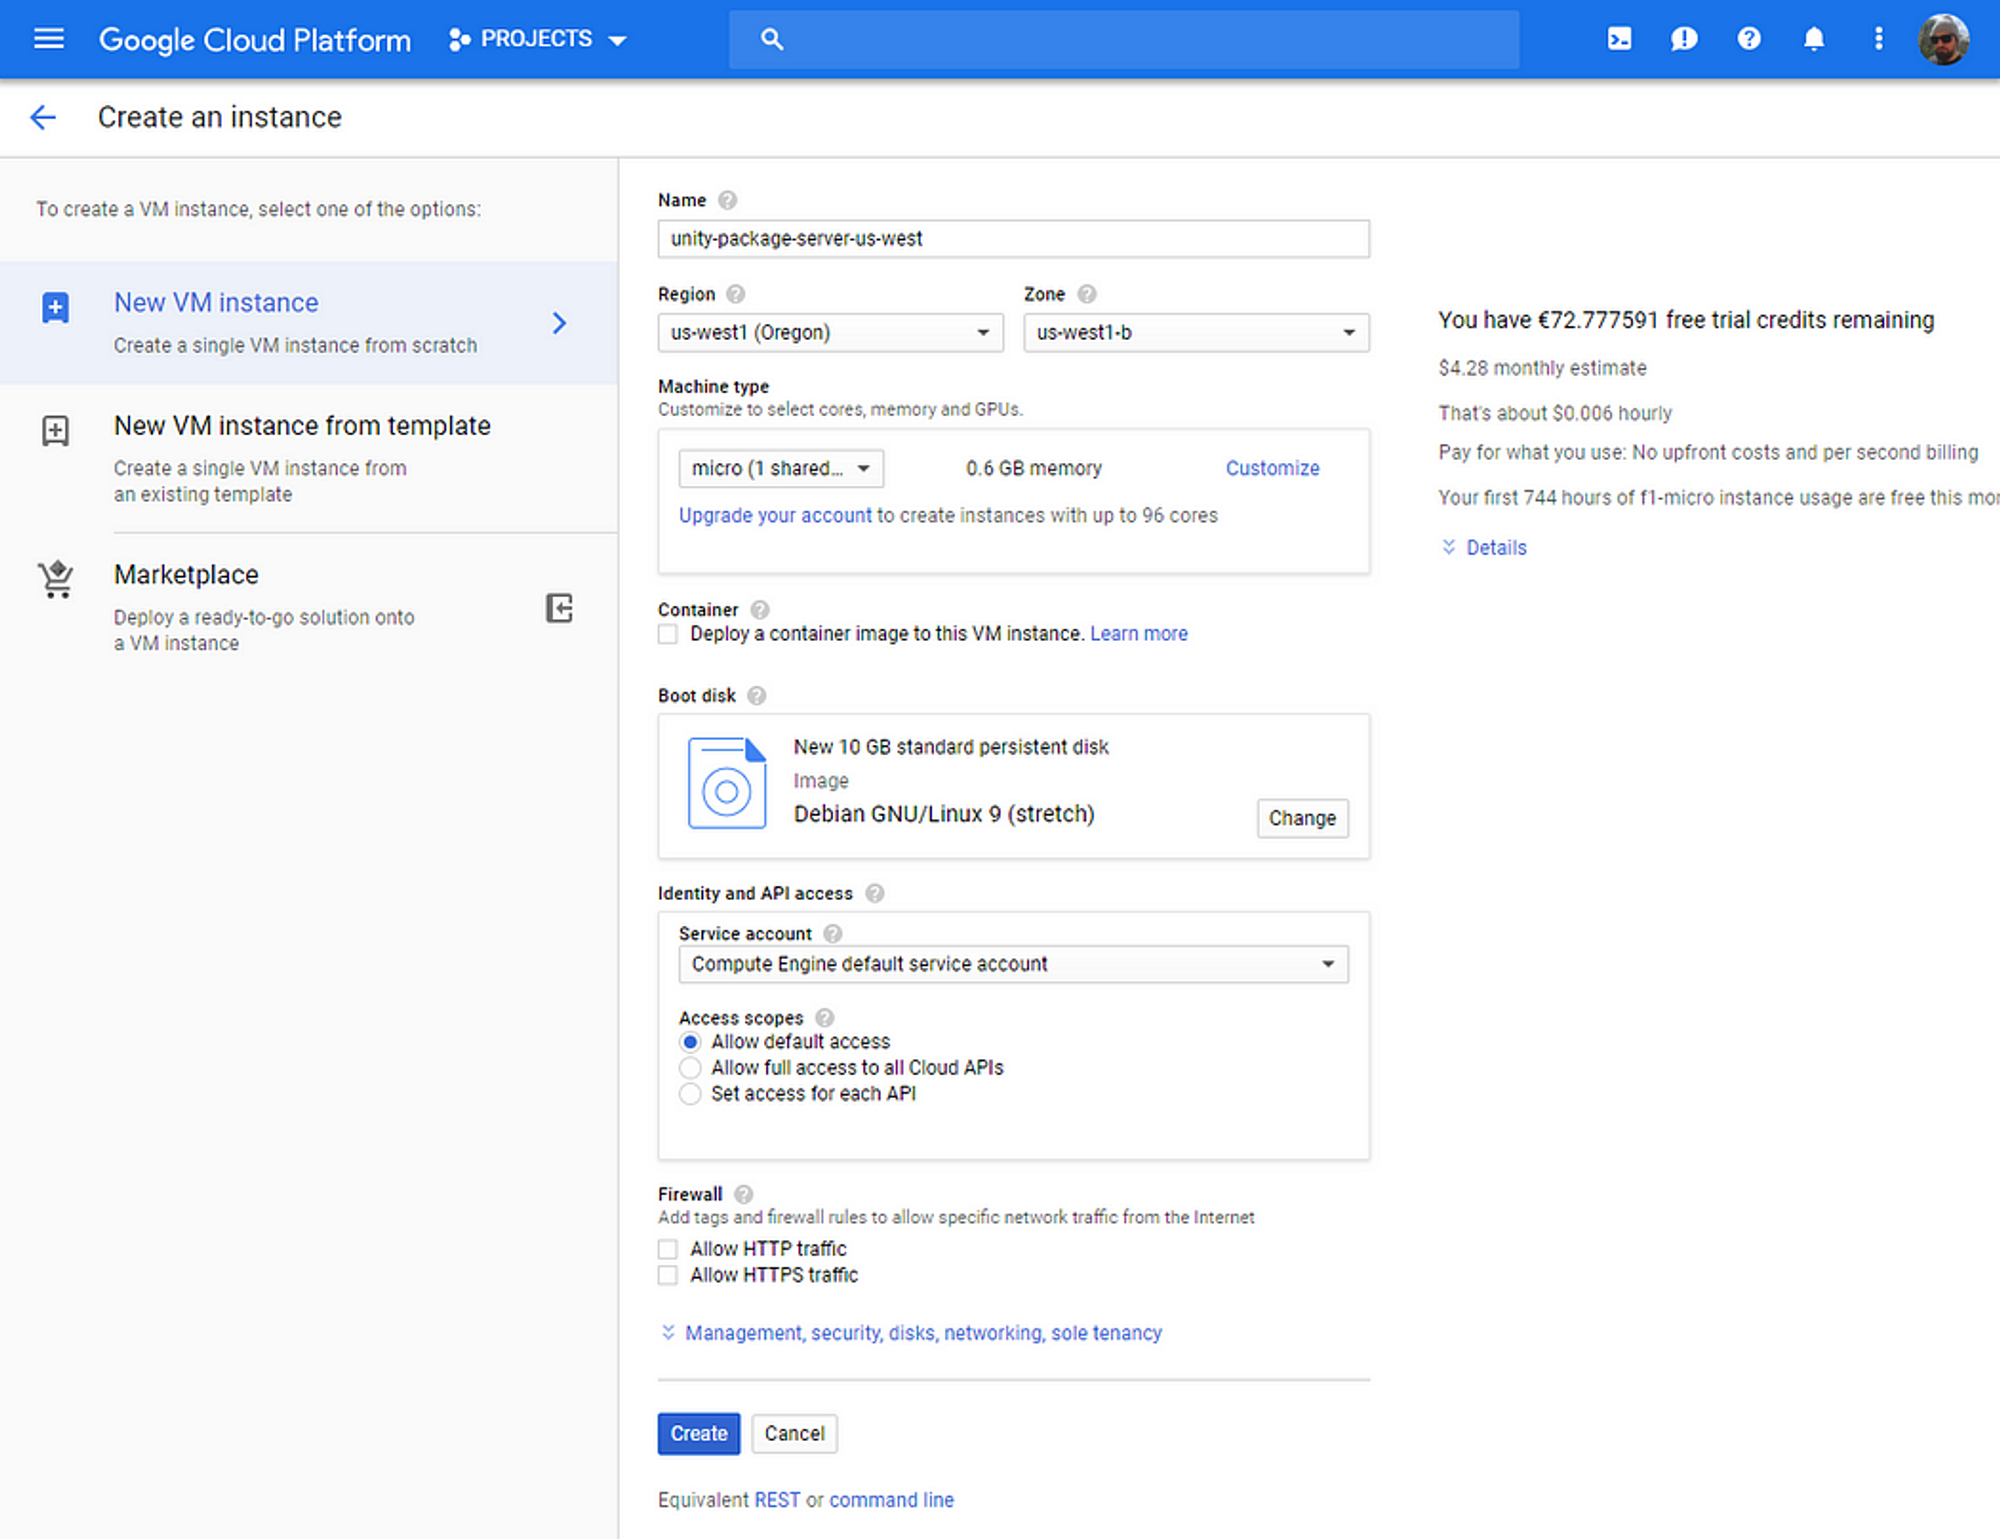
Give it a name, choose a region, select micro as the machine type, and click Create to create your Debian 9 Linux Server with 10GB of storage. Notice how it estimates the monthly cost as $4.28 - and that’s indeed pretty close to what I’m paying for it per month. With our instance created and running, we’ll now connect to it by clicking on SSH.
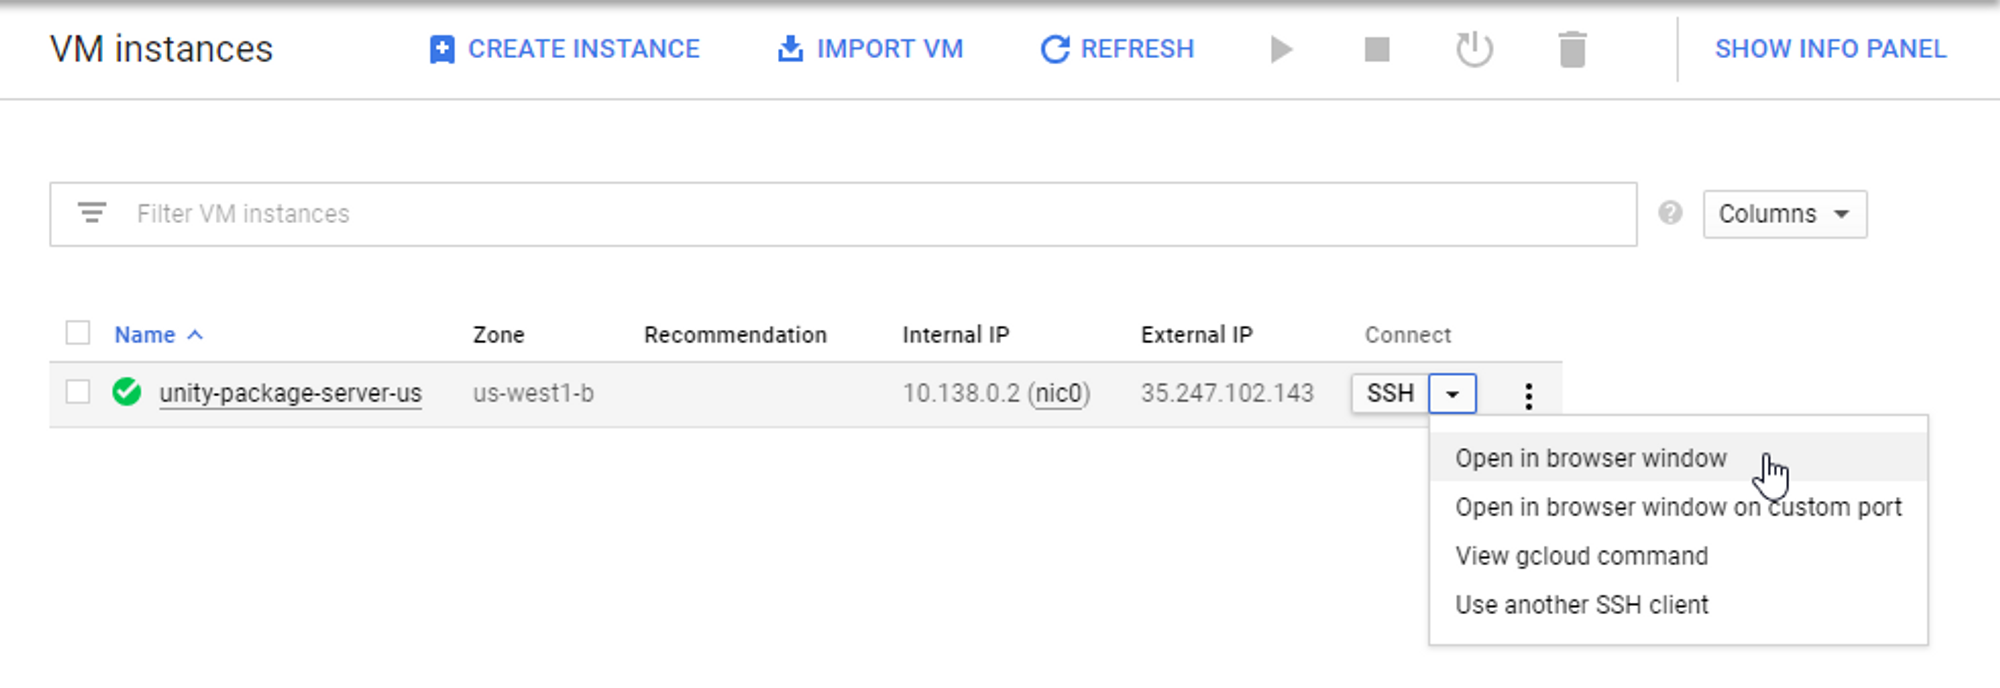
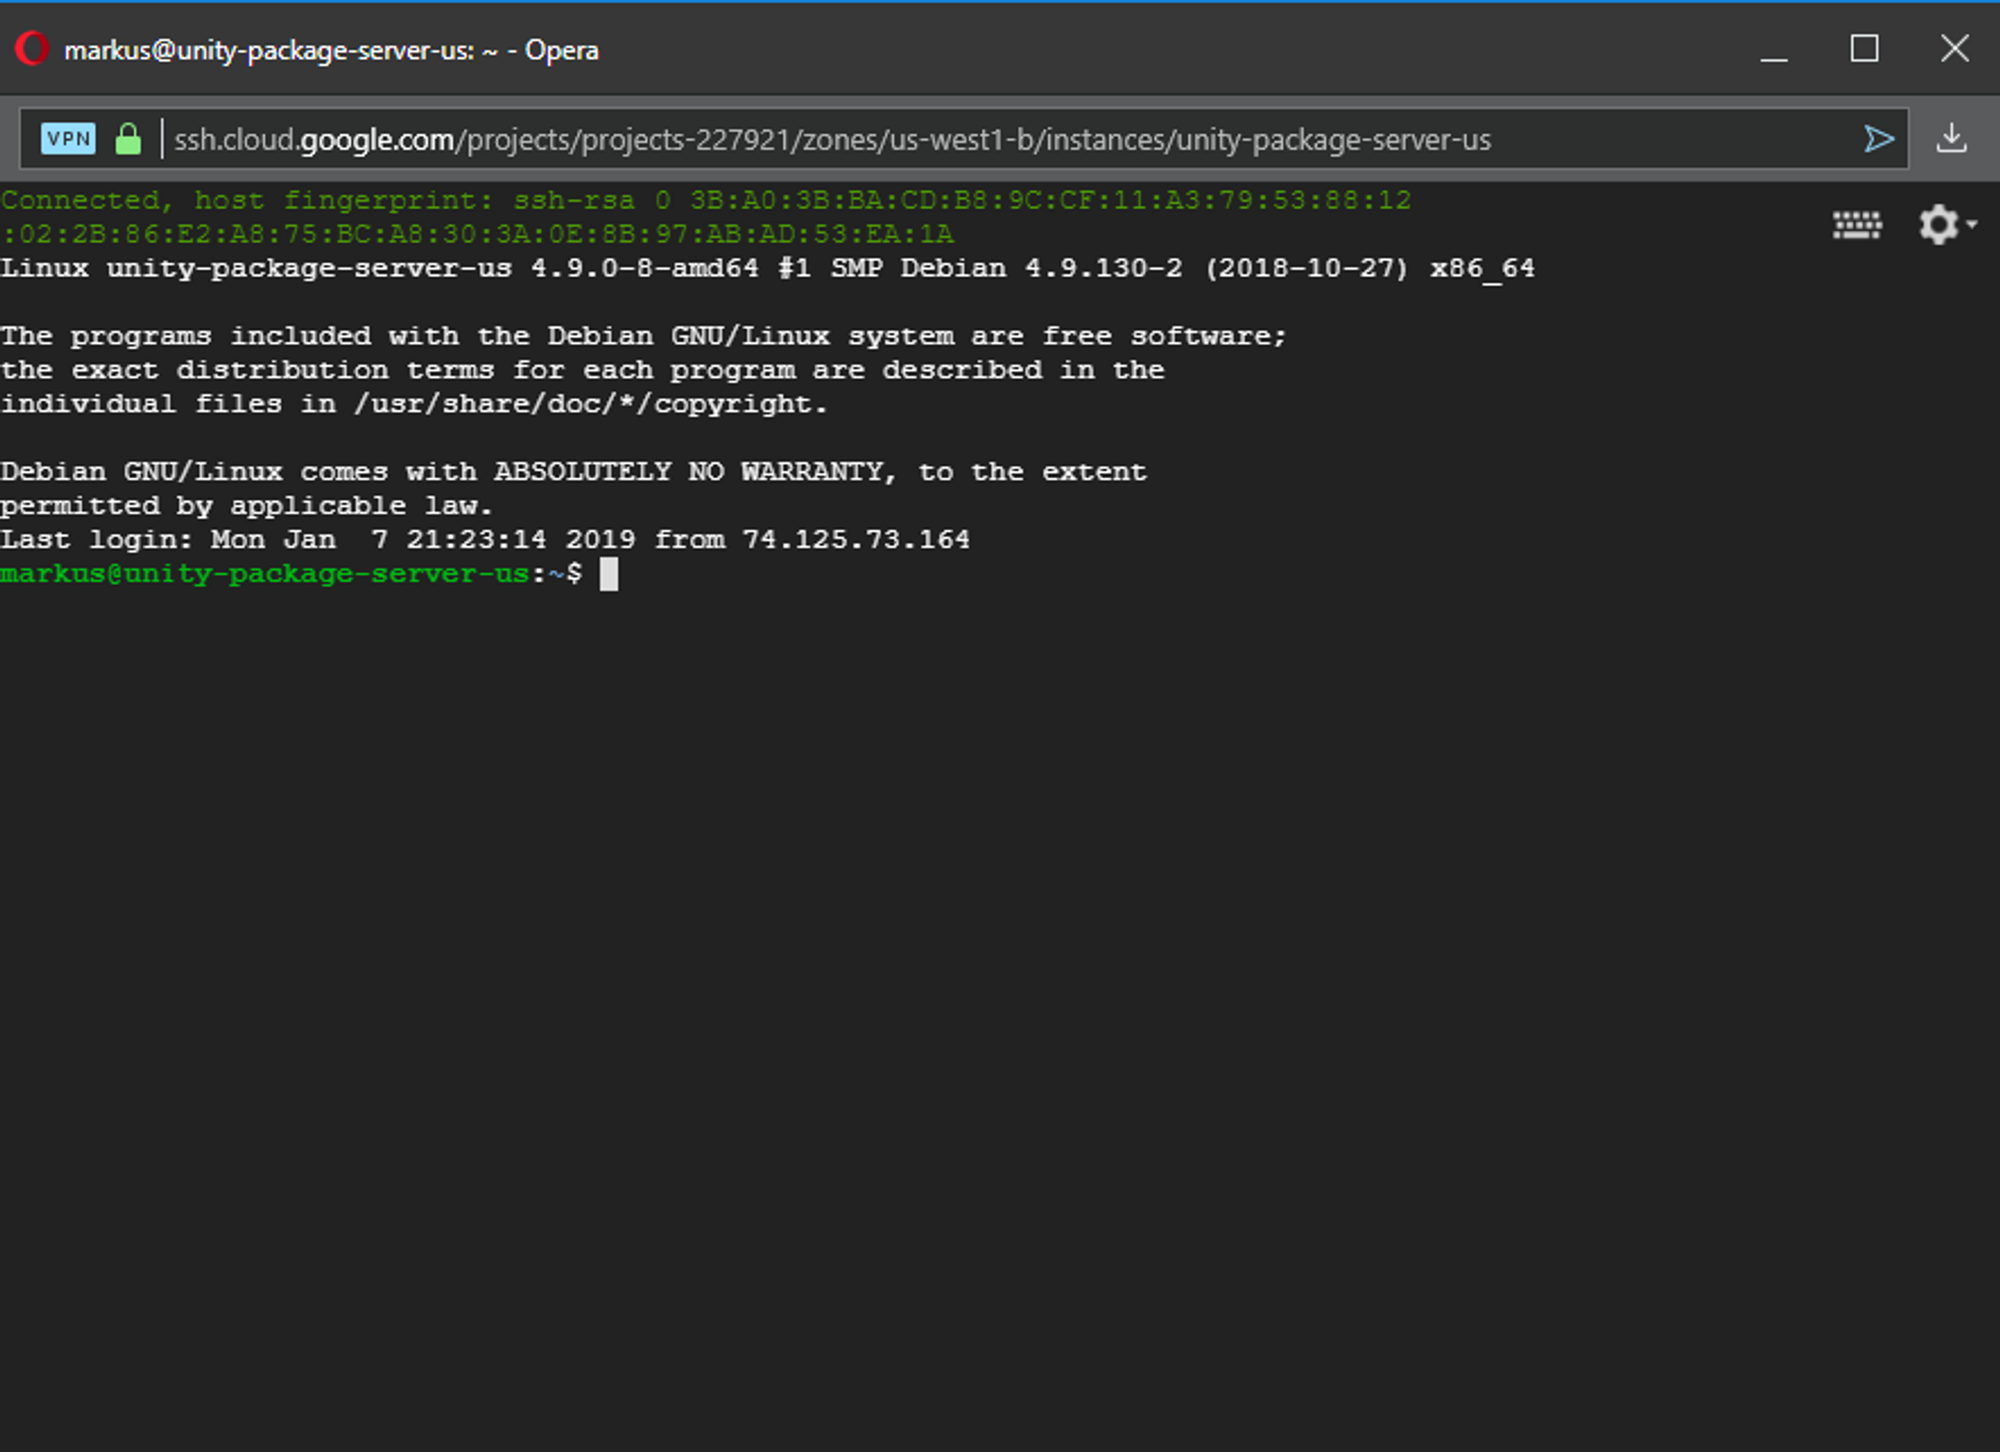
This will open up a Linux terminal in a browser window
2. Installing and Configuring Verdaccio Prerequisites
2.1 Install node js and npm
Now we’ll install or own package server, Verdaccio. We want to do this as the root user, so we’re going to create a password for the root:$ sudo passwdThink of a password and enter it. And enter it again. Now log in as the root (su = superuser = root):$ suIt asks for the password you just set, enter it and you should now be logged in as the root user! Next, we’ll install NodeJS and npm (the node package manager)
$ curl -sL https://deb.nodesource.com/setup_18.x | bash -
$ apt-get install -y nodejs
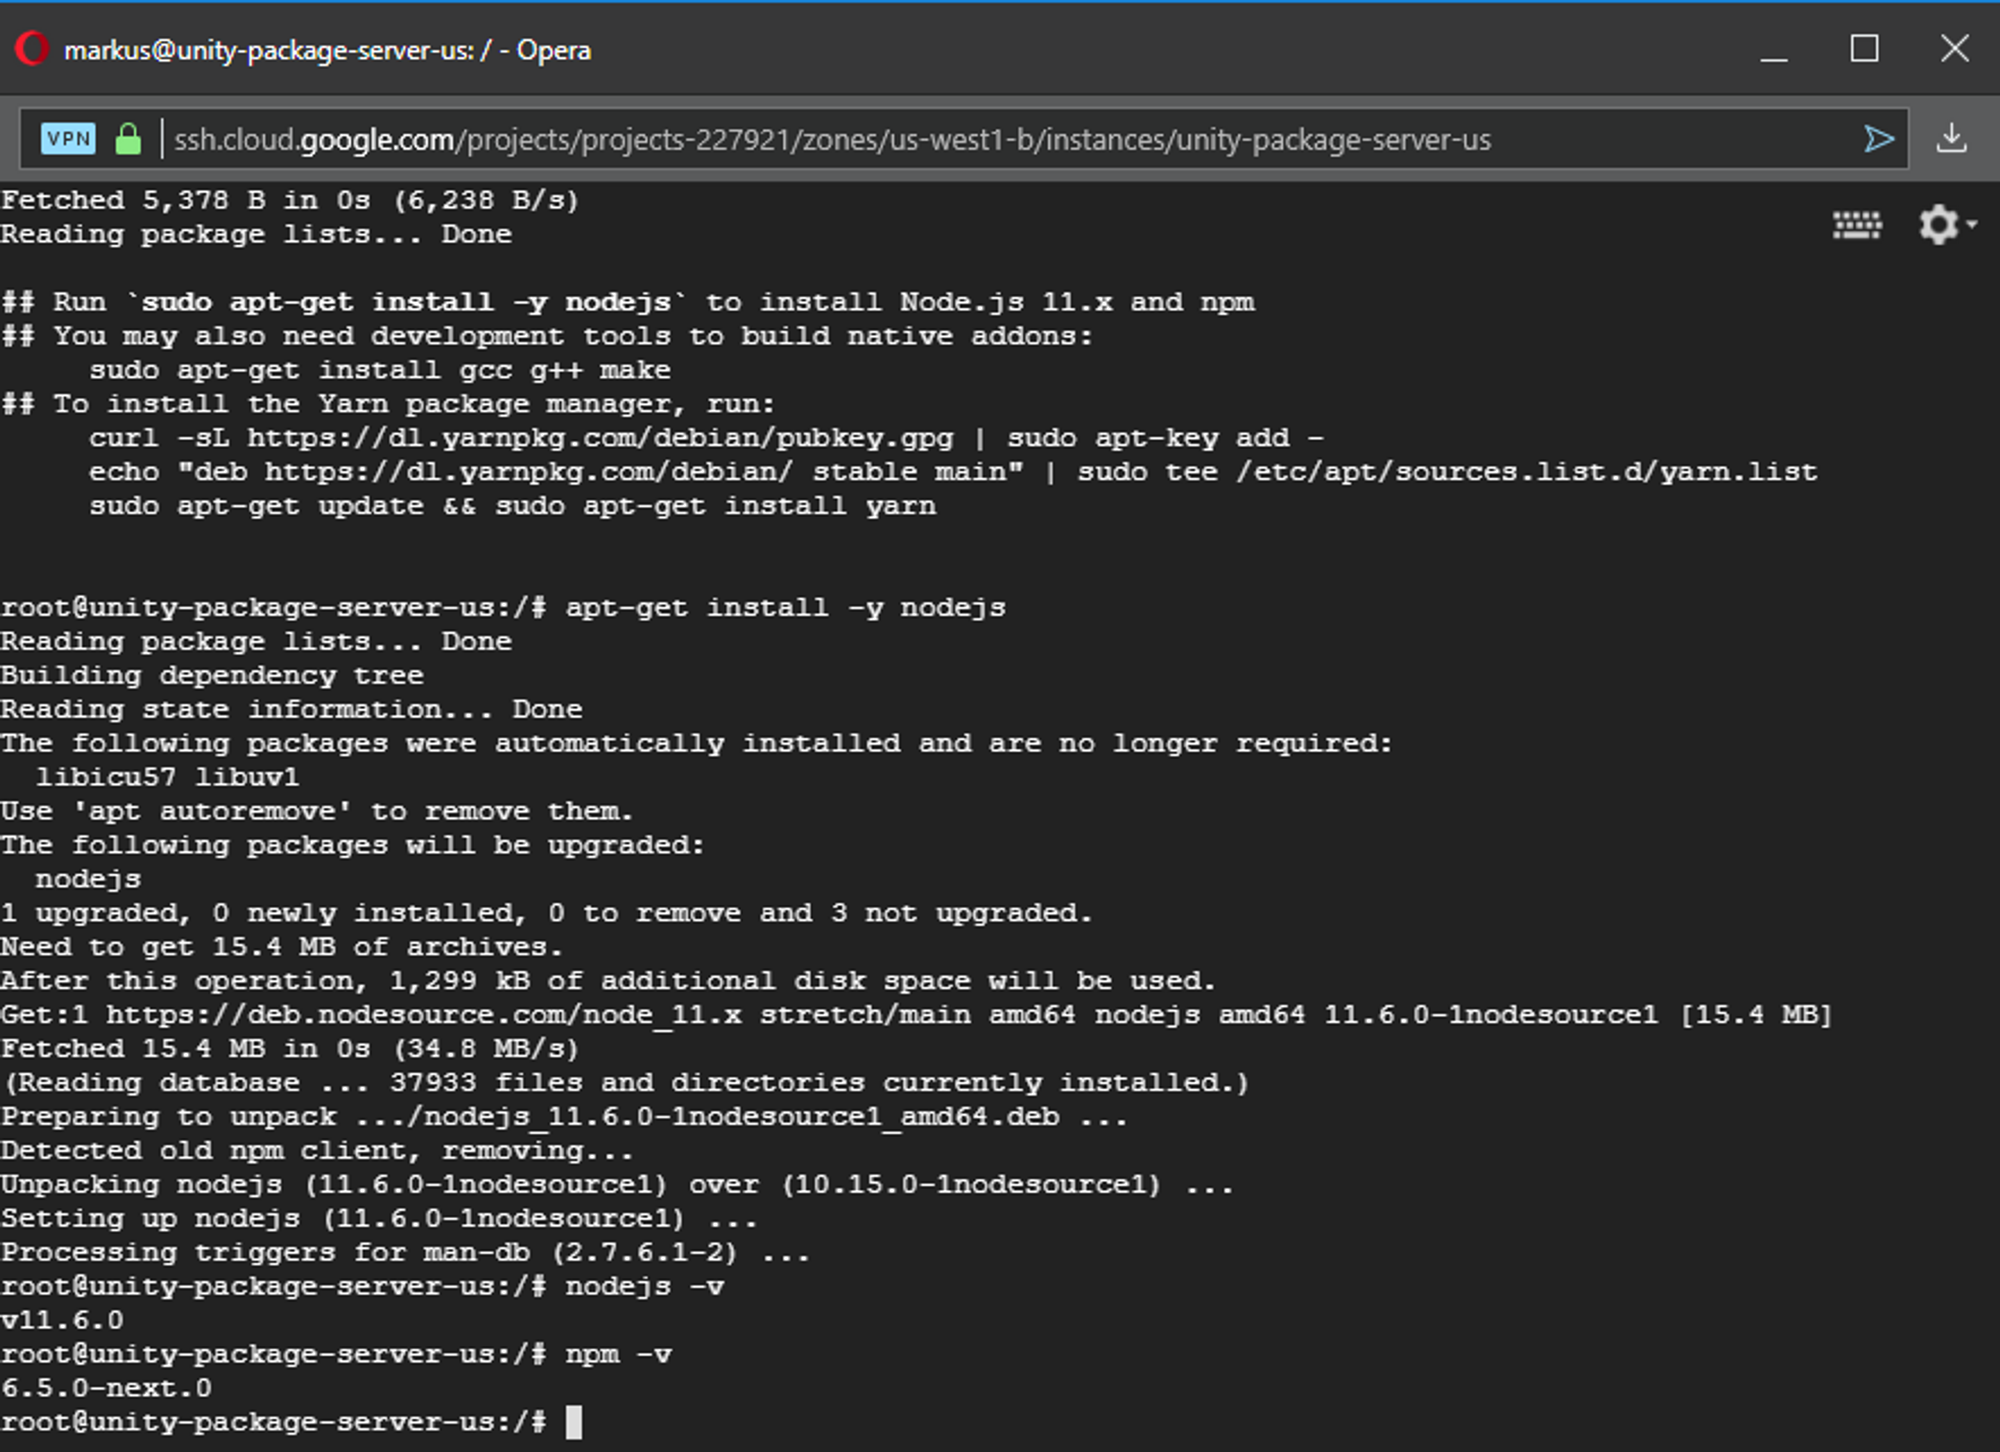
For both these steps you’ll see it installing things, no errors should come up. To verify that both node js and npm are installed correctly you can check their versions like this:
$ node -v
$ npm -v
If each command shows you a version, then it worked!
2.2 Installing Verdaccio
Now we’re ready to install Verdaccio!
$ npm install --global verdaccio
Let it install. Once it’s done switch back out of super-user mode by either pressing CTRL+D or typing exit, because while we wanted to install it as the root user, we want to run it as a normal user.
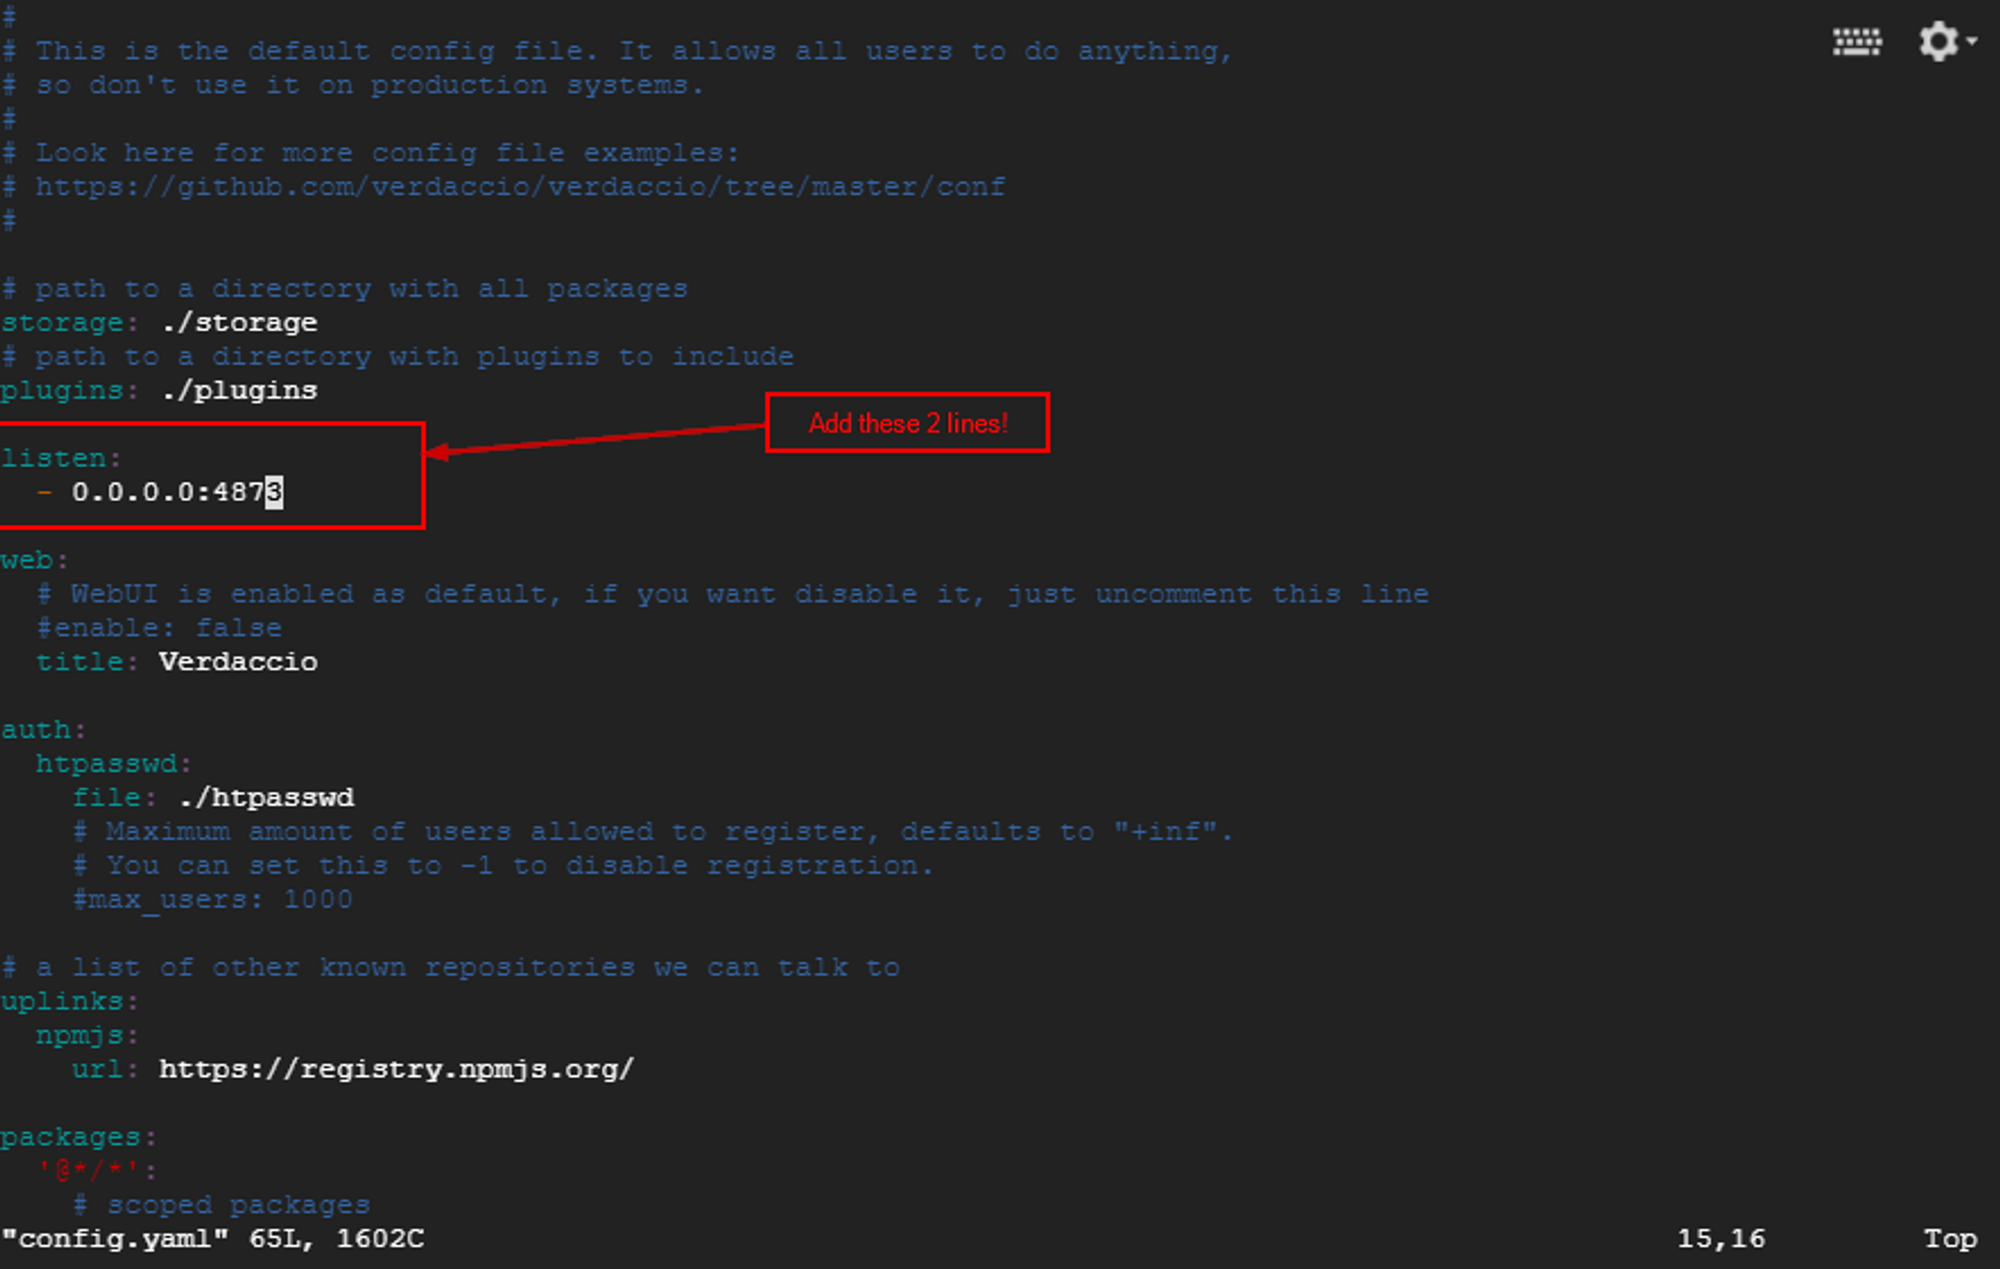
We’ll configure it in a second, but first, we need to run it to make sure it generates its config file.$ verdaccioThen press CTRL+C to kill it and we’re ready to change the config file!$ cd verdaccio $ vim config.yamlThis opens the config.yaml file in the VIM text editor. All we need to do is add two lines to tell verdaccio to listen to all signals from everywhere as long as they come through port 4873:
1listen:2 - 0.0.0.0:4873Press i for insert. Add the two lines, then press ESC to come back to command mode. Now type :x and press Enter to save the file and quit VIM.
Let’s run verdaccio!
$ verdaccio
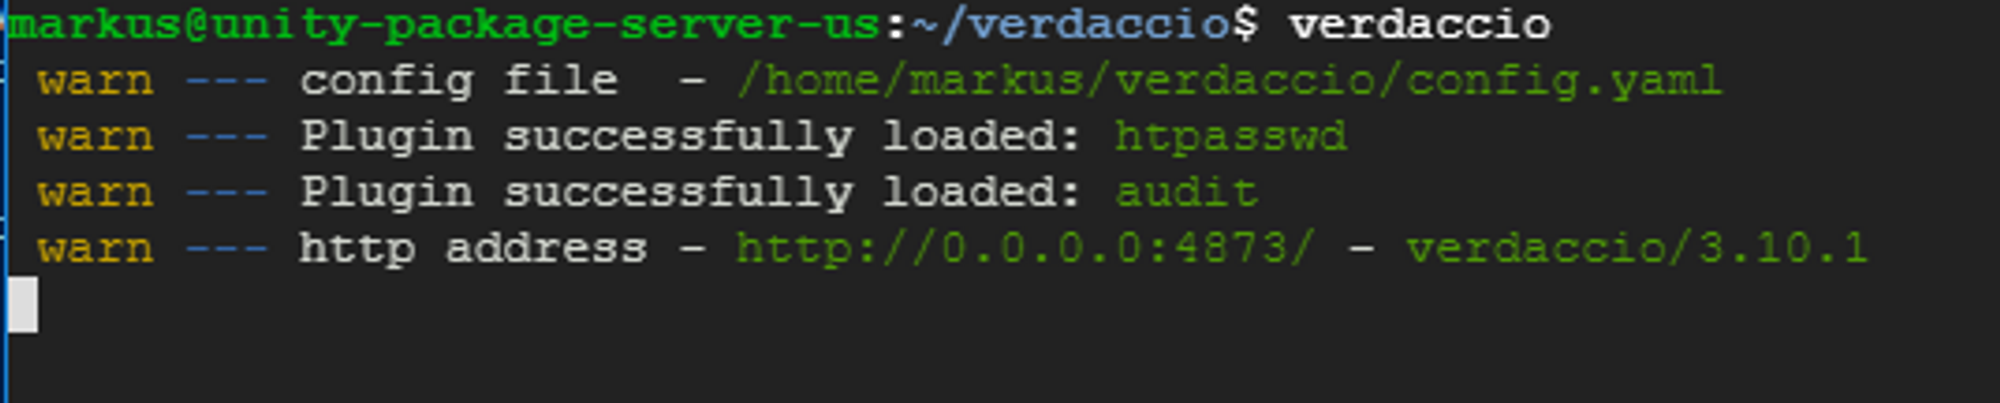
Verdaccio is running on port 4873!
2.3 Setting up Firewall
Now we need to tell the firewall around our server instance to unblock port 4873 so we can communicate with Verdaccio from the outside! Go to the Google Cloud Platform Console > VPC network > Firewall rules and click Create Firewall Rule.
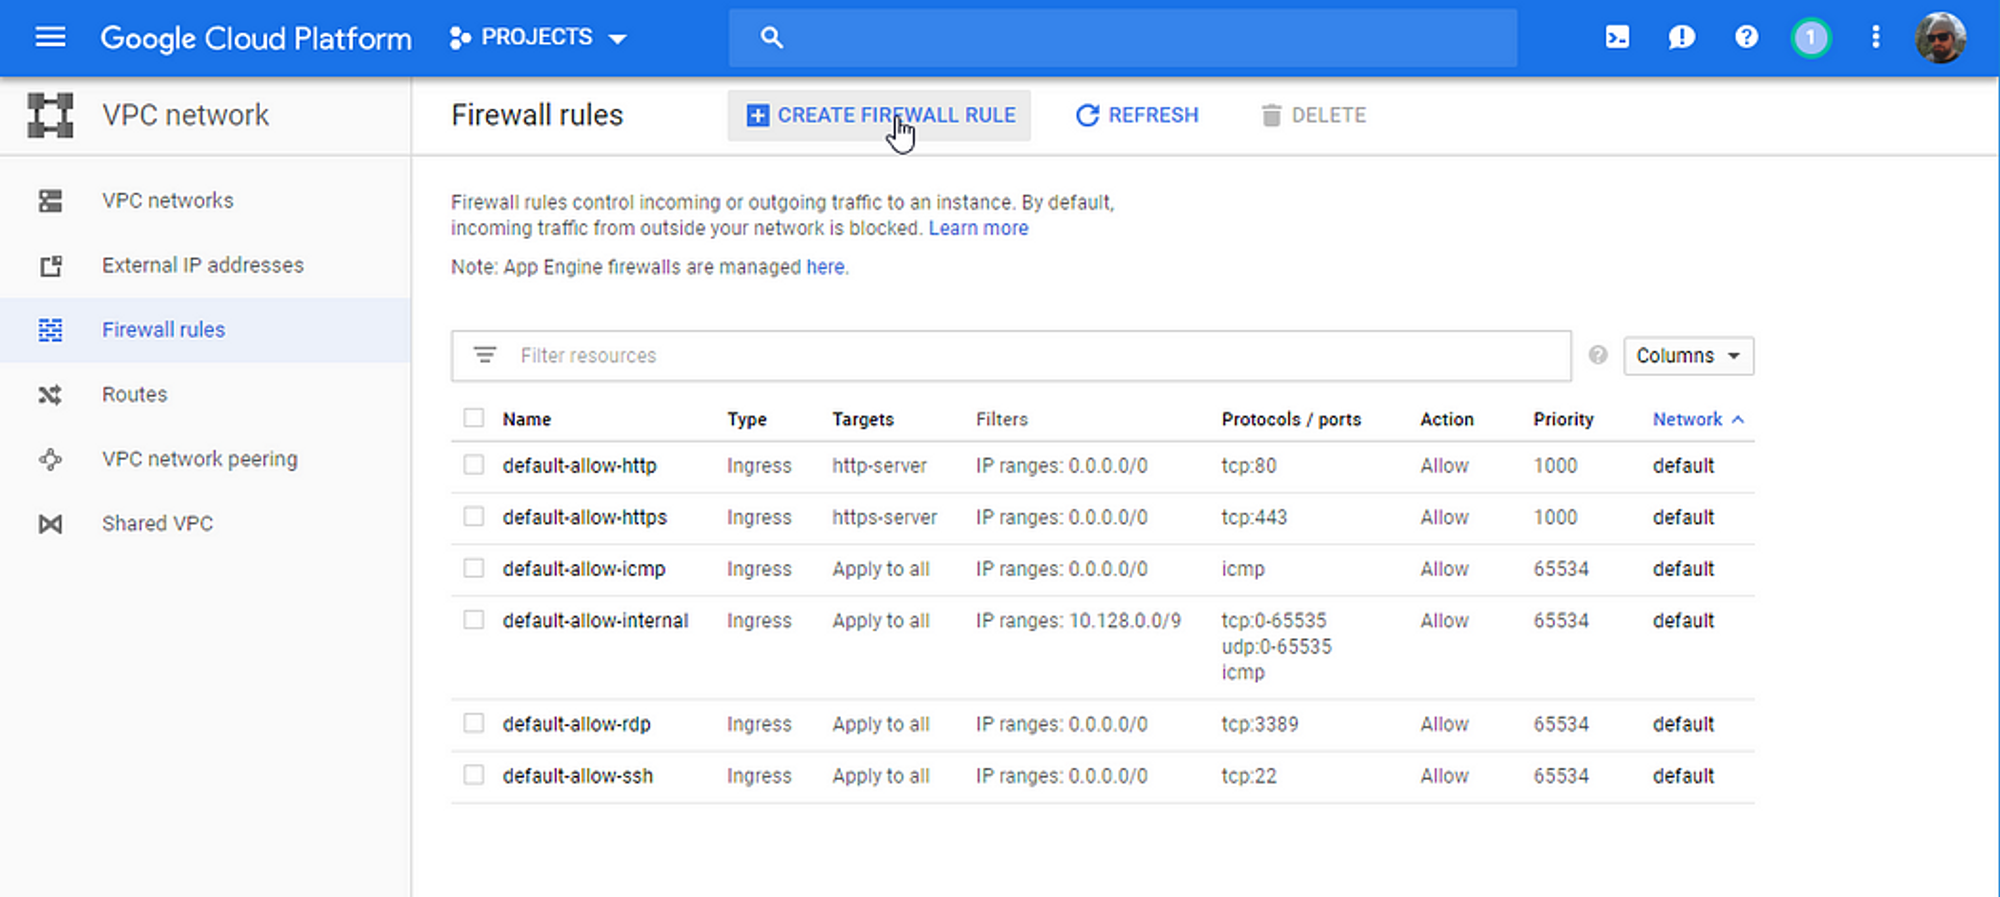
We want to create a rule that allows incoming traffic (Ingress) from all possible IPs (0.0.0.0/0) for TCP port 4873.
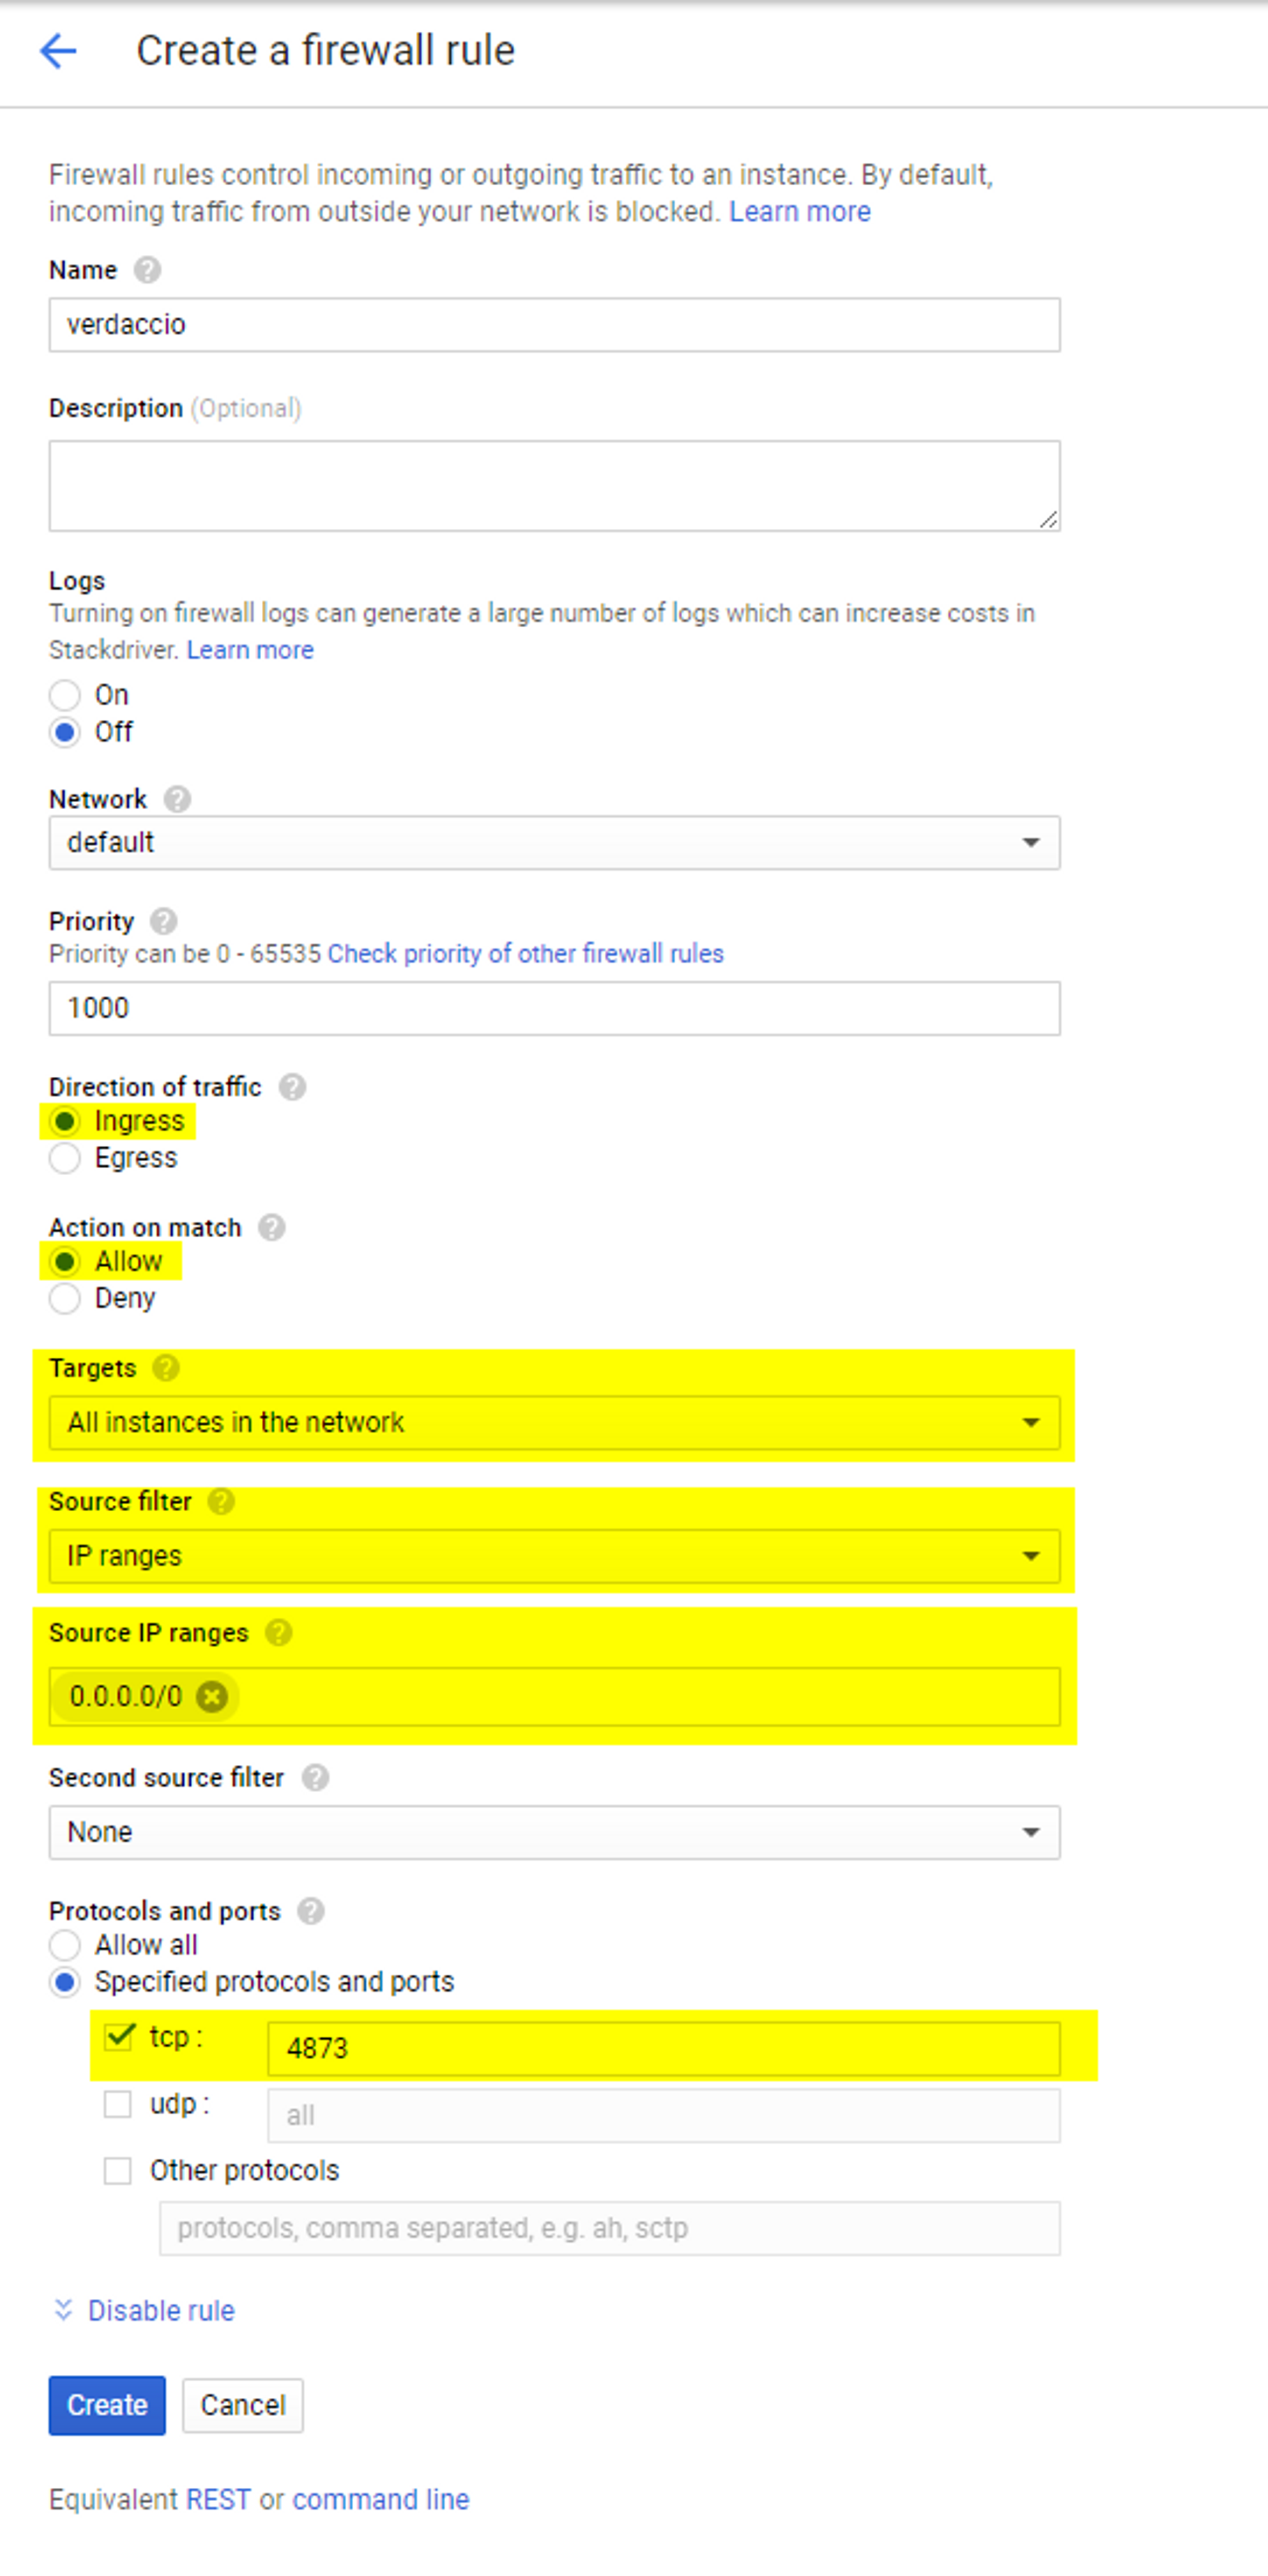
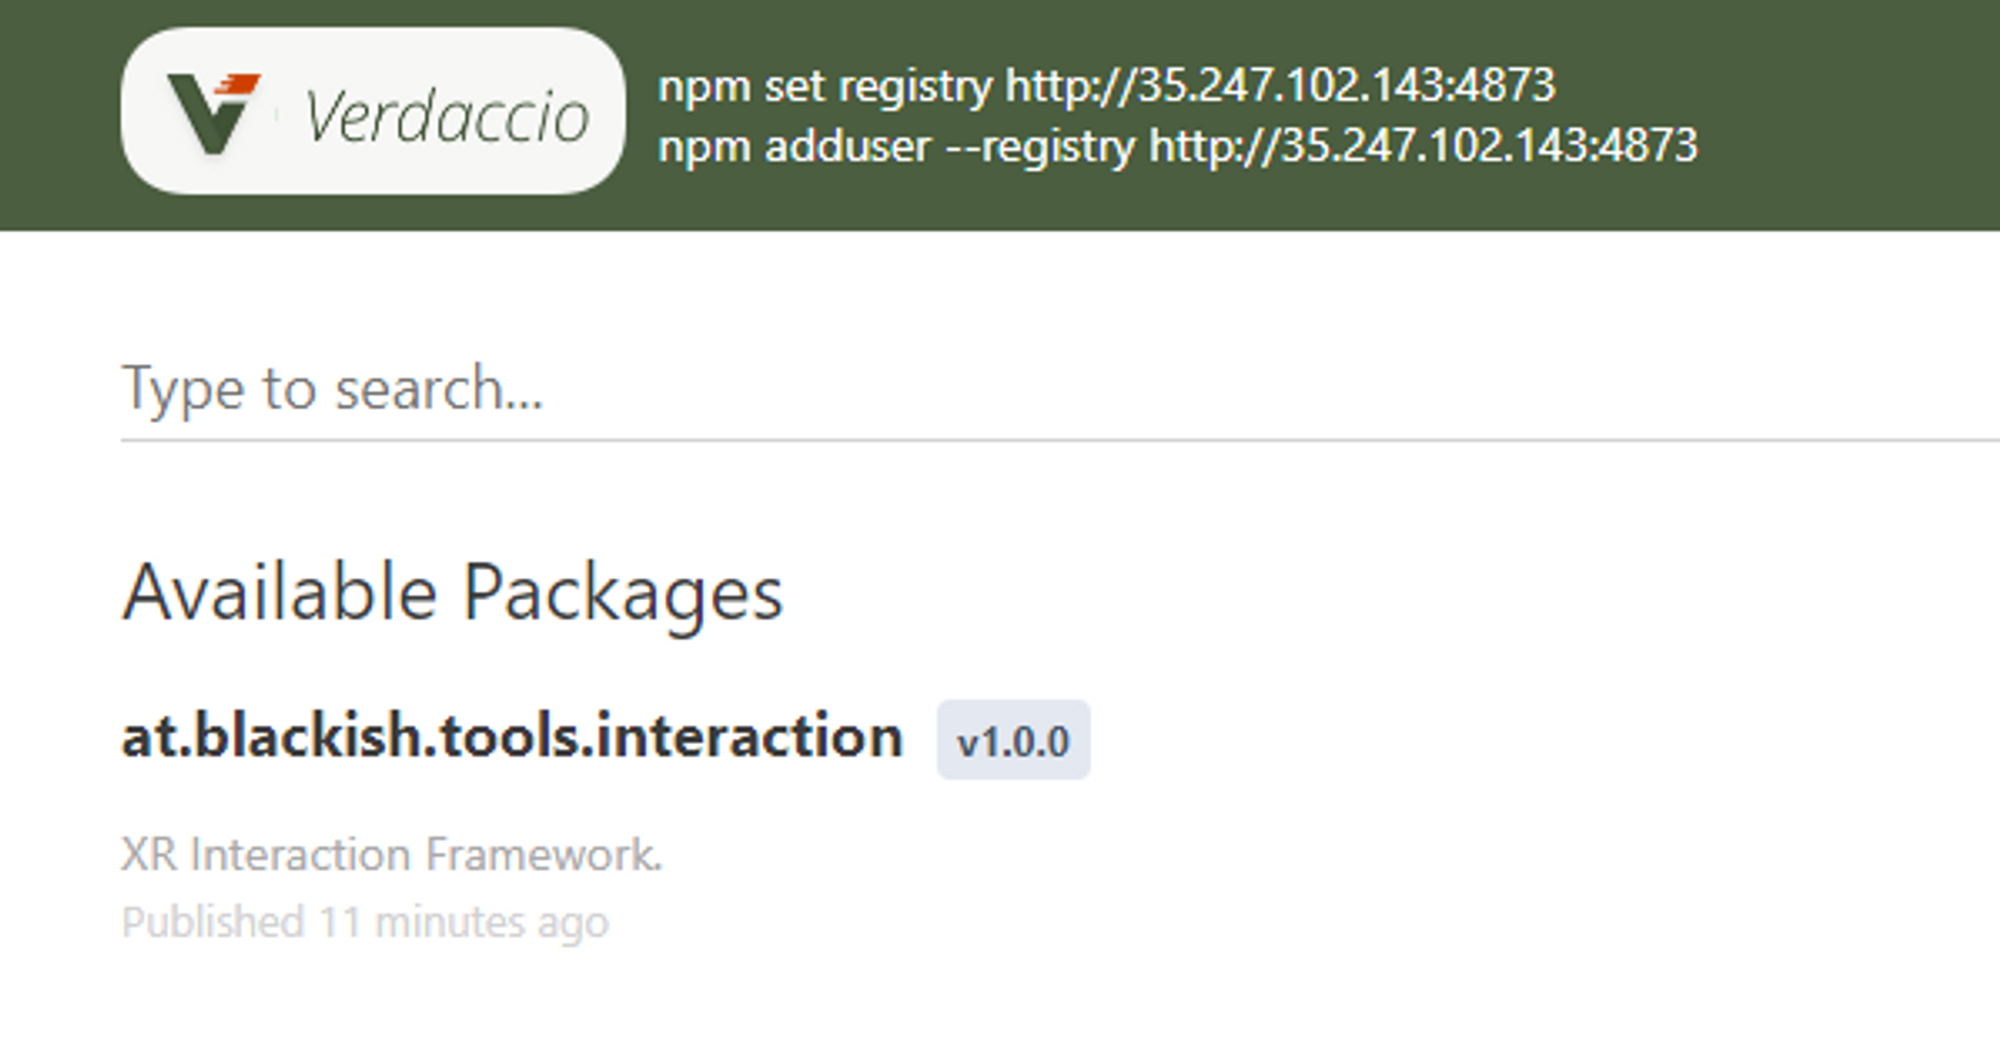
I marked the important bits in yellow. Turns out most of the bits were important…And we’re done installing! Verdaccio is running and accessible from the outside world! Point your web browser to http://[your server’s IP]:4873 and you should see this:
2.4 Keeping Verdaccio alive
Nice! The only problem is: As soon as we close the console window, Verdaccio gets shut down, so we have to work around that with a little tool called screen! (should be installed, if it’s not you can get it with sudo apt-get install screen) Press CTRL+C to kill Verdaccio and type$ screen
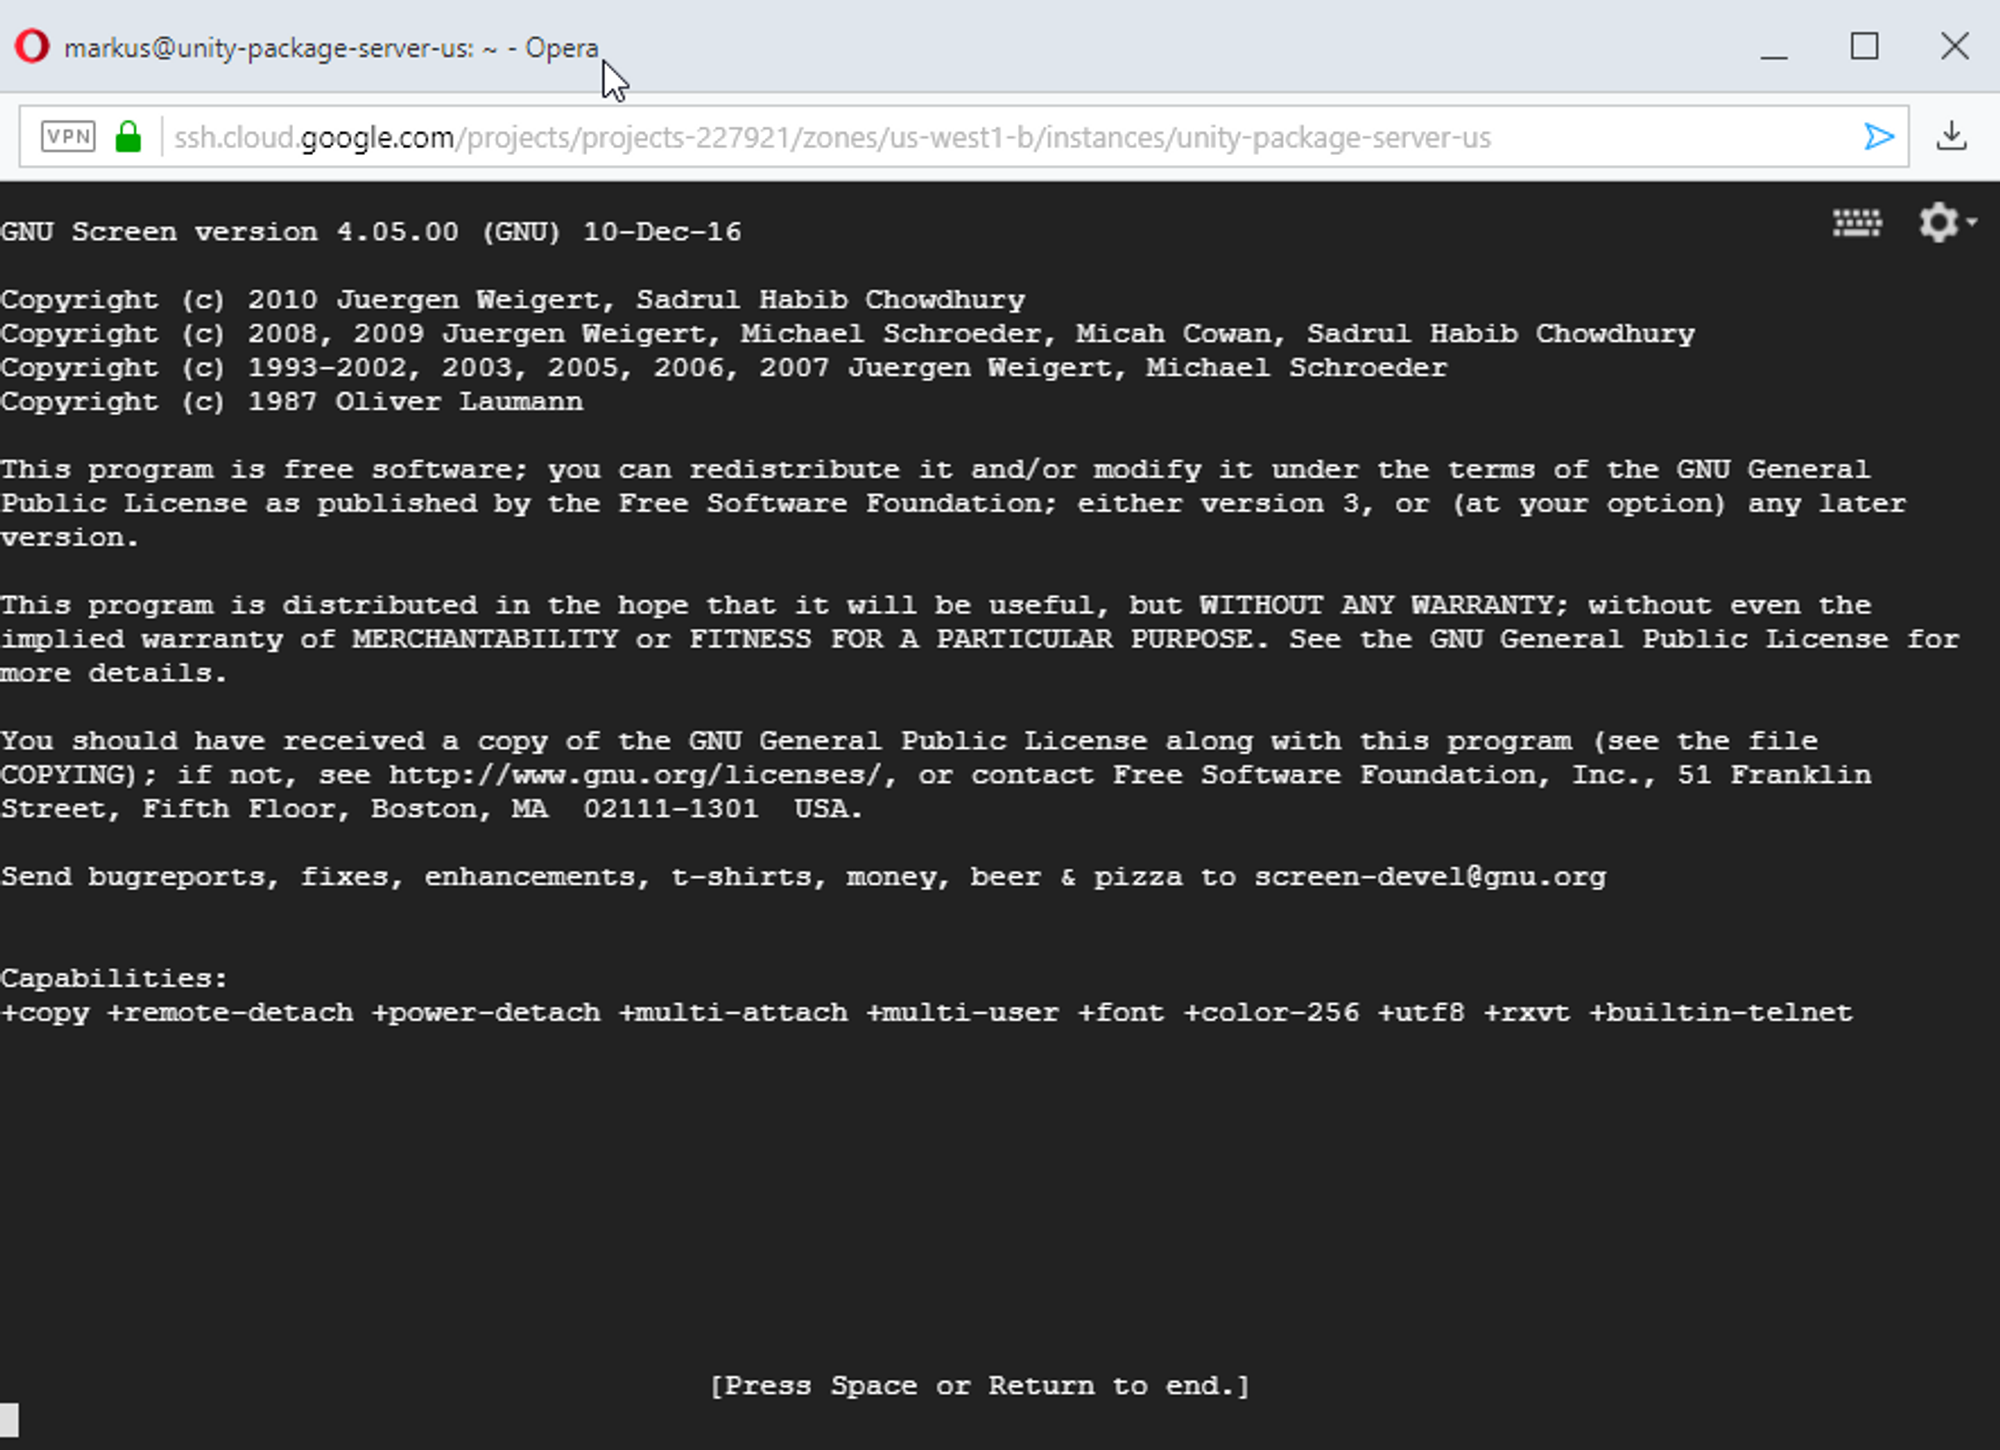
This opens up a new virtual screen, a kind of safe place, which is where we will now launch Verdaccio:$ verdaccioThen we simply press CTRL+A and CTRL+D to detach the screen session. It’s still running in the background with Verdaccio safe and sound inside it and we can even get back to it at any time by typing screen -r, but most importantly we can now close our terminal window without killing Verdaccio! Now we’re ready to create users, add packages, and hook it up into Unity!
3. Creating a user
Let’s open PowerShell (or something similar) on our local machine and create a user! (You’ll need npm for this — if it’s not installed you can get the installer here — remember how to check if it’s installed? Works here too!)
npm adduser --registry http://[Server IP]:4873
Enter a username, password, and email address and you should be created and logged in!
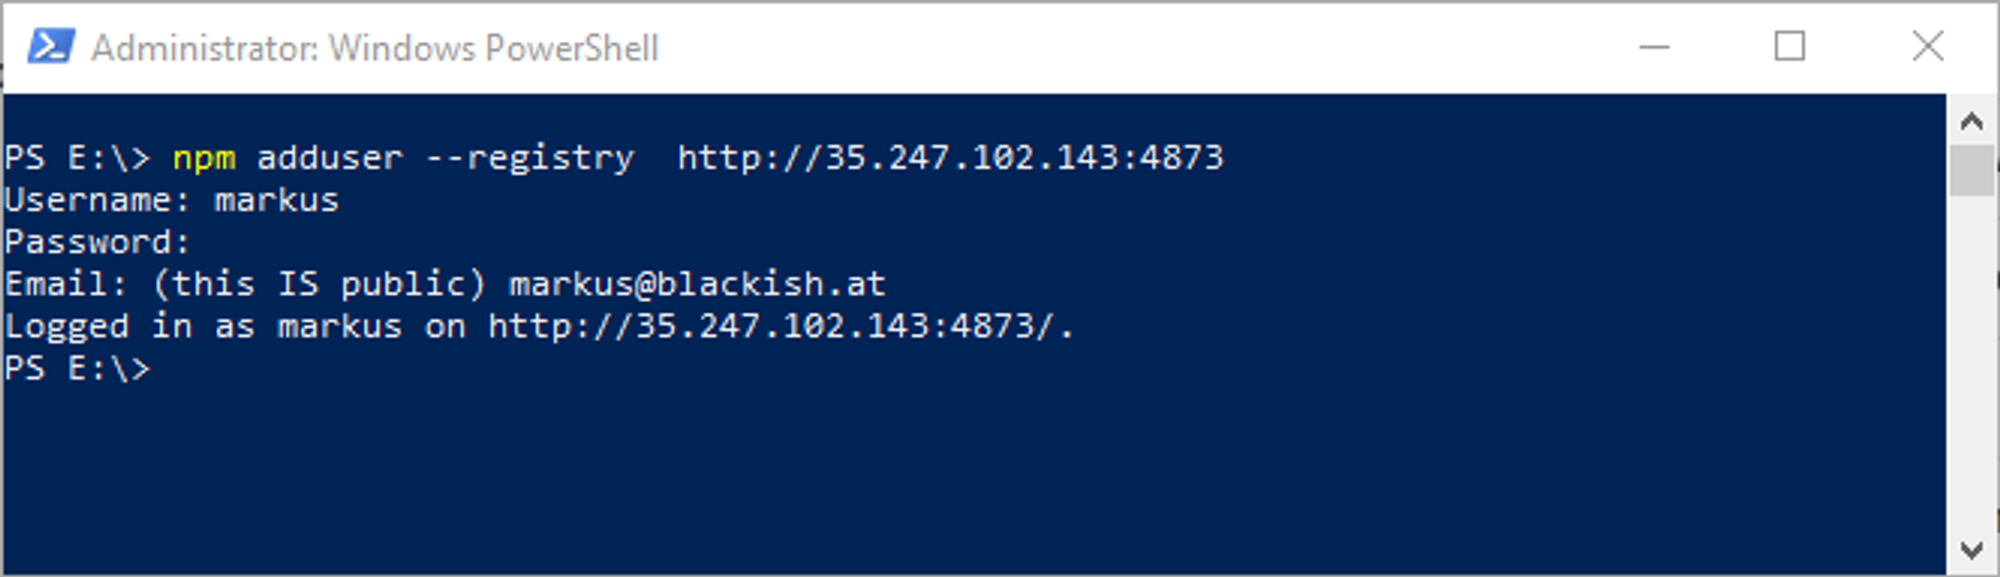
User created! Later on, you can log back in with
npm login --registry http://[Server IP]:4873
4. Creating and uploading packages
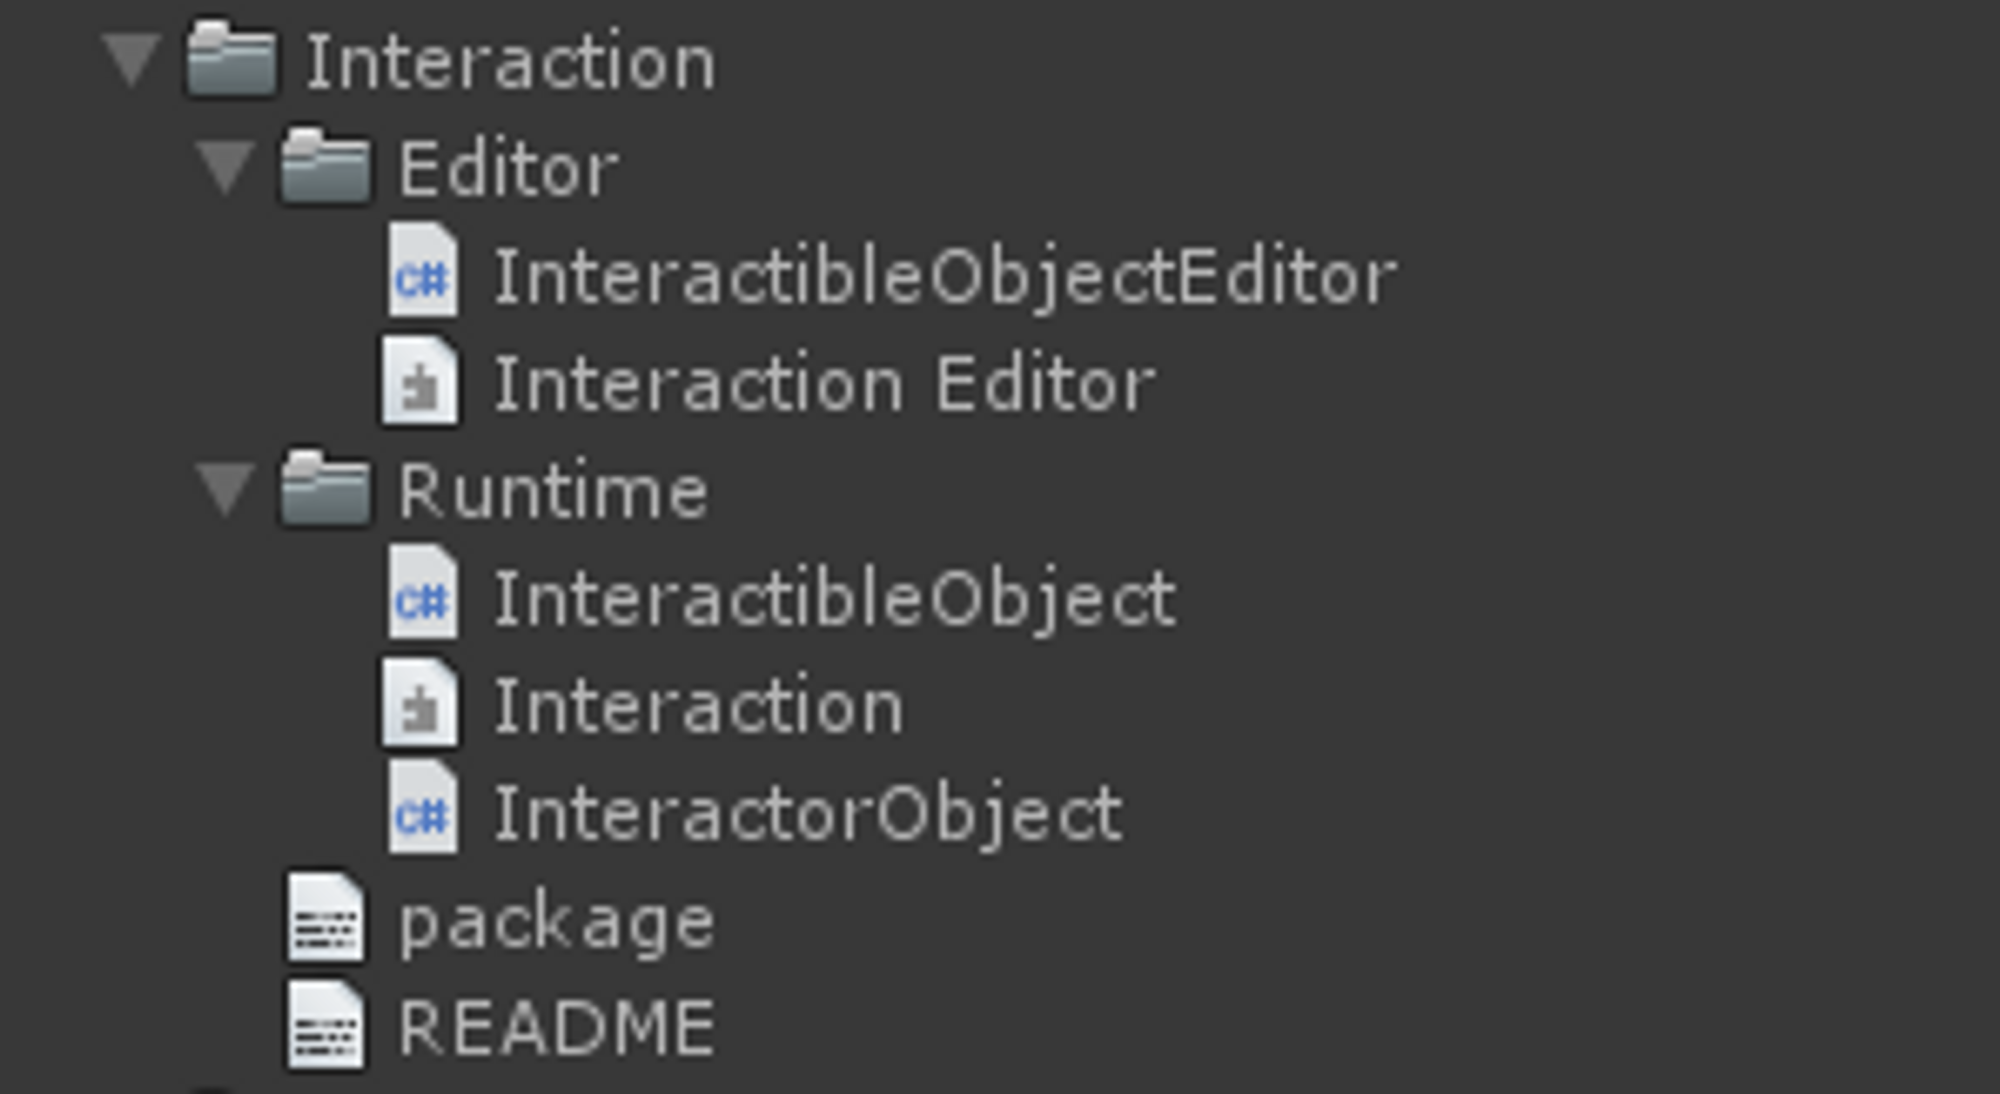
The process for this is simple: Put all the files into a folder, add a package.json file that holds all the relevant information, and upload everything via npm! I recommend having that folder in a Unity project because the resulting package will not work if a meta file is missing, and having it inside Unity makes it easy for you to see if everything is in order. Let’s add a file to the root of the folder that looks like this: for a package without dependencies. Note how you can define a required unity version, description, and other things. You could even add a README.md file. You also need to have assembly definition files in there or it will not compile (as the actual files will reside outside the Assets folder), so make sure those are set up correctly!
Your final folder could look like this. Once it’s all set, go to the folder you want to publish in PowerShell and do:
npm publish --registry http://[Server-IP]:4873
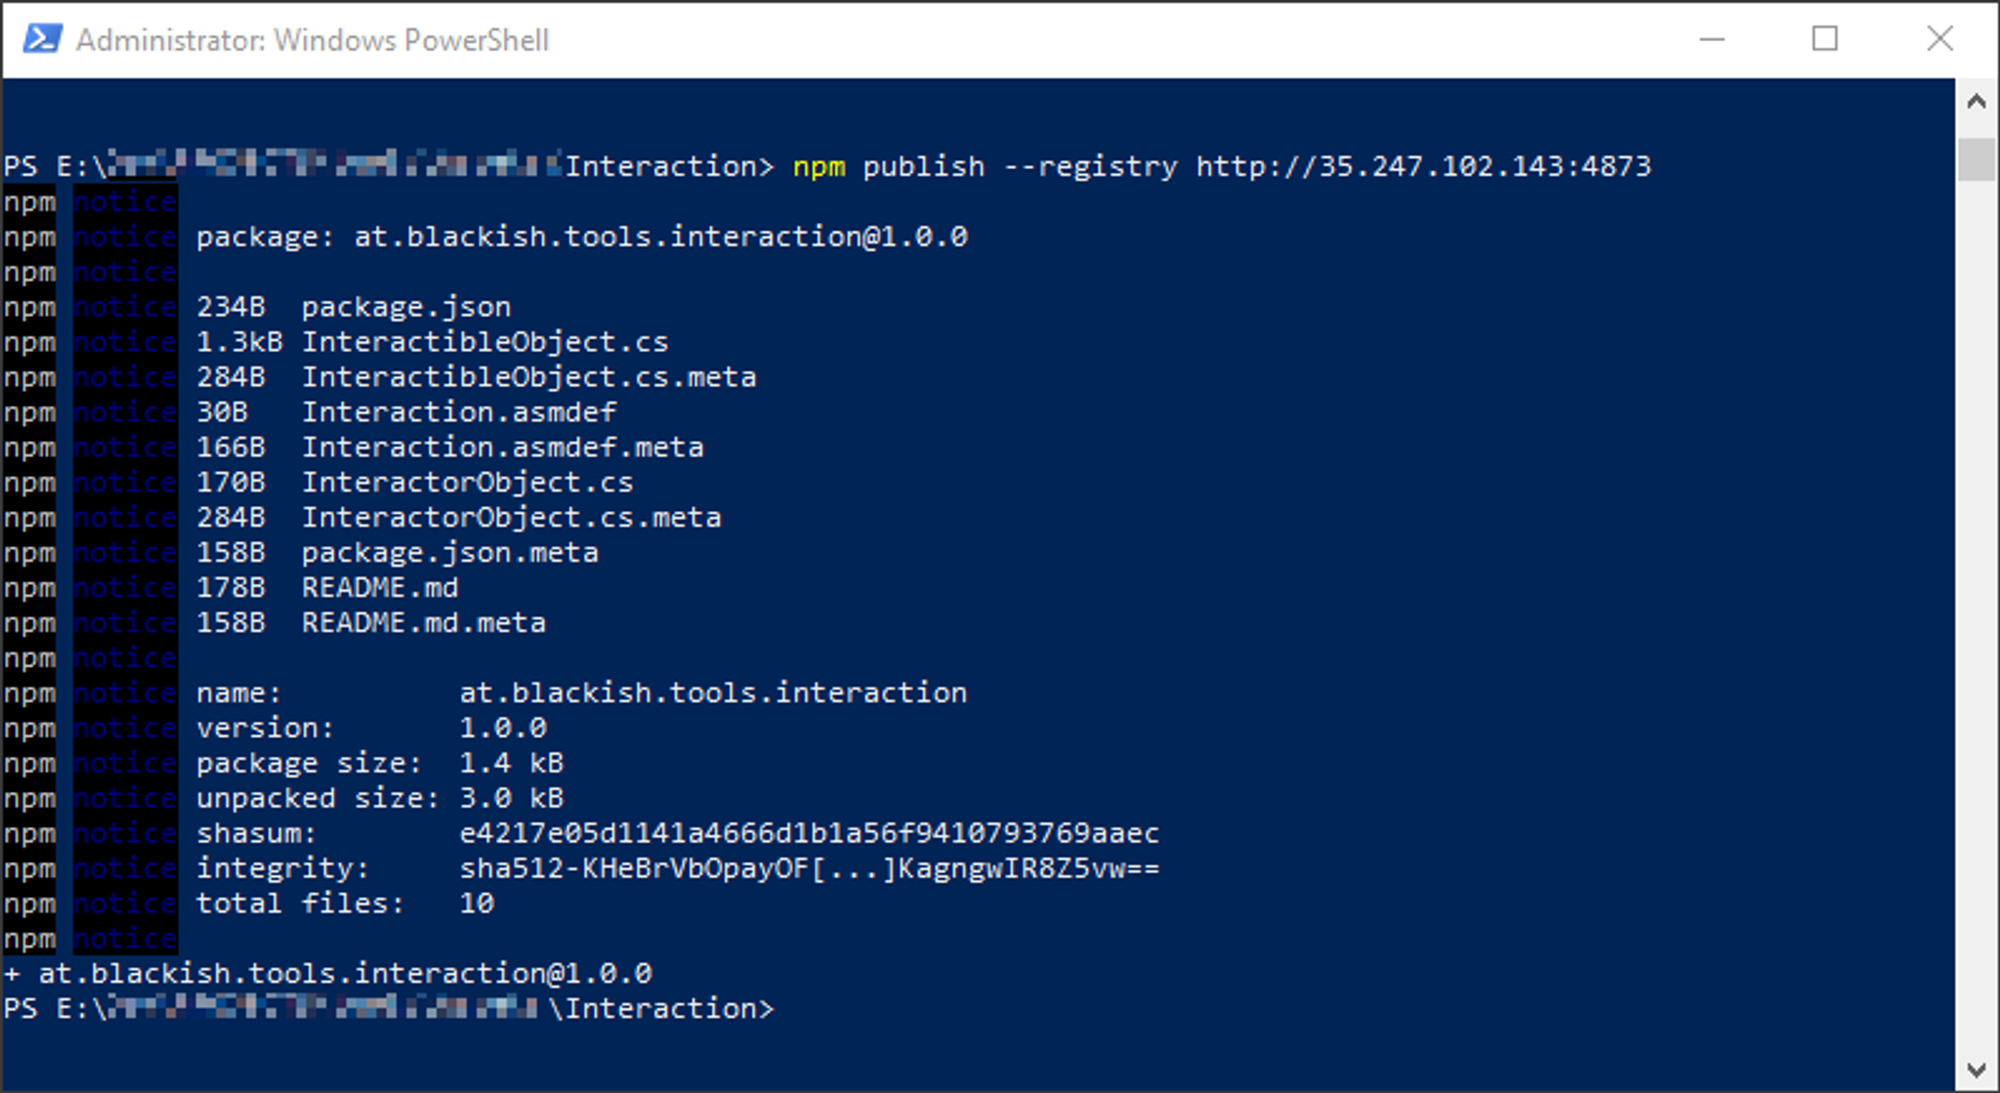
npm and verdaccio will do the rest and your package will now be visible on verdaccio’s web interface!
Updates
If you want to release an update to your package, simply increase the version in your package.json file and publish the same way! Verdaccio will keep the entire history of your packages so dependencies will always bring in a compatible version.
Unpublish (remove) a package from the server
You can get rid of packages too. This will remove all versions and get rid of the package entirely:
npm unpublish --force at.blackish.testpackage --registry http://125.138.25.12:4873
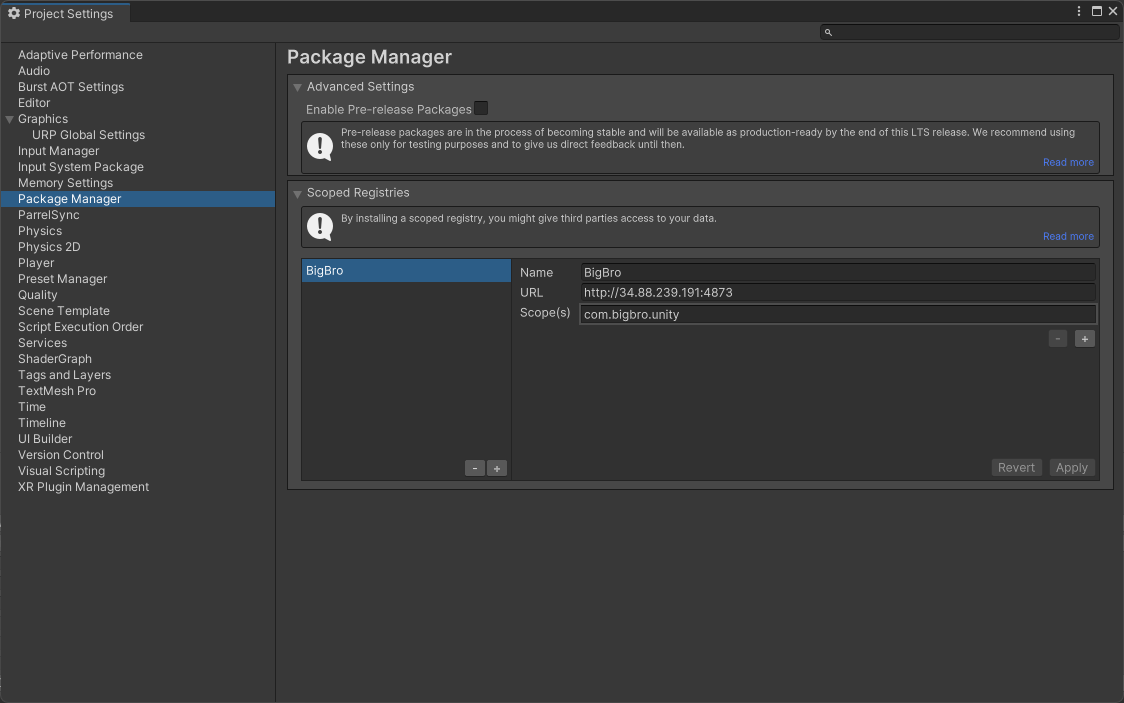
5. Setup scope registry in Packages
Now there’s only one last thing to do: Get the Package Manager to talk to Verdaccio ****and show our custom packages! And you can hook it up in the Editor>Project Setting>Package Manager, and you can also define the scope to get access to different categories.
6. Restricting access
At the moment everyone who knows the IP address of our server can create users, get packages, add packages and even delete packages. That’s not exactly ideal. I should probably look into that…Just kidding, I did look into that. The simplest way to at least stop everyone from uploading and deleting packages is to restrict registration. Once all your users have registered you can simply set max_users: -1 in the config file and no one can register anymore. All your user data is stored in the htpasswd file, so you could even set up all users by hand (tools like this one can help you md5-hash your passwords) and having registration disabled from the start.
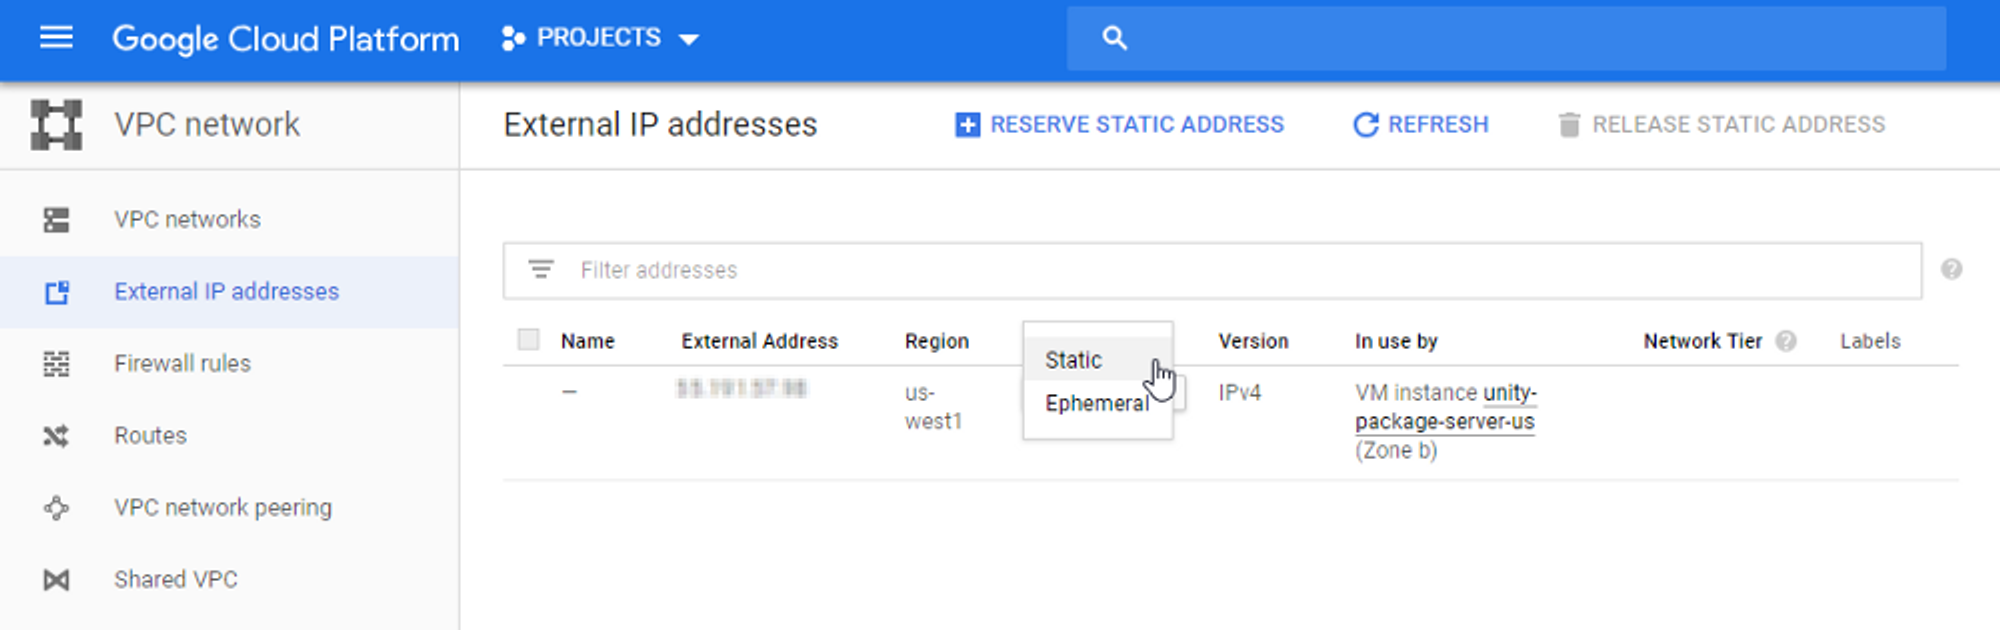
Reserve a static IP address
The way we have set it up the external IP address of our server instance changes every time we stop and start the server. We don’t plan to do this very often, but it might still be a good idea to go to VPC network > External IP addresses and switch the type of our IP address from Ephemeral to Static.
Google is only charging for reserved IP addresses that are not in use, so if you have your server running continuously, it should not add any extra cost. But if it’s not in use the reserved IP will cost $0.010 per hour — almost twice as much as the $0.006 per hour it costs to run our micro instance. Keep that in mind…
Remove Uplinks
Uplinks are a way to connect Verdaccio to other npm registries. If a package is not found on your server it would then look in those other places and potentially cache it locally. This feature has potential, but I’m pretty sure we don’t want our server to look for unity packages on the npmjs registry, so let’s comment that out for now:

Apart from that, You can also set up a CI for package management. Here is a link for GitHub Action for Verdaccio. I am still work on that, might write a blog about that in the near future.
Reference
https://docs.github.com/en/actions